Cut each fat quarter into 4 – 5” wide strips. (parallel to selvage, remove selvage 1st)
Cut each strip into 2 – 5” x 9” rectangles.
Each fat quarter yields ten rectangles for a total of 40 – 5” x 9” rectangles.
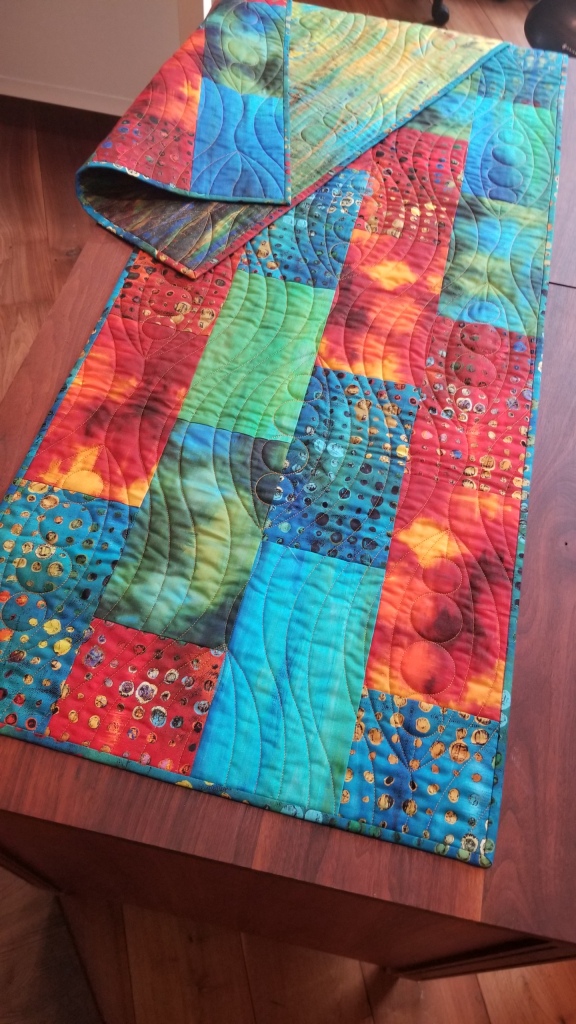
According to the diagrams below: Arrange the rectangles in a pleasing manner, by placing into four rows of ten rectangles
Using a ¼” seam allowance, stitch ten rectangles end to end. Make four units.
Press seams to one side.
Select two units and cut the first rectangle in half. Stitch the piece you cut off to the other end of the same row as shown in the diagram.
Stitch the four rows together alternating the two different rows as shown. Make sure to center the seams in the middle of the block in the next row. To make this easier, use a wash away pen to mark the center point.
The binding is made with 6 – 2.5” strips.
Four rows of ten rectangles. 2nd & 4th row cut first rectangle in 1/2 and stitch to other end of same rowStitch rows together making sure that the seams are exactly in the middle of the rectangle beside it in the next row
This is a long table runner. It can be cut in half to make to short table runners or cut into six pieces to make a half dozen placemats. To make the placemats faster, machine quilt the on large table runner and cut into placemats after quilting. You will need extra fabric to bind six placemats
Quilt the whole piece to make a large table runner. If two smaller table runners or six placemats are desired, cut to size after quilting the whole large piece.
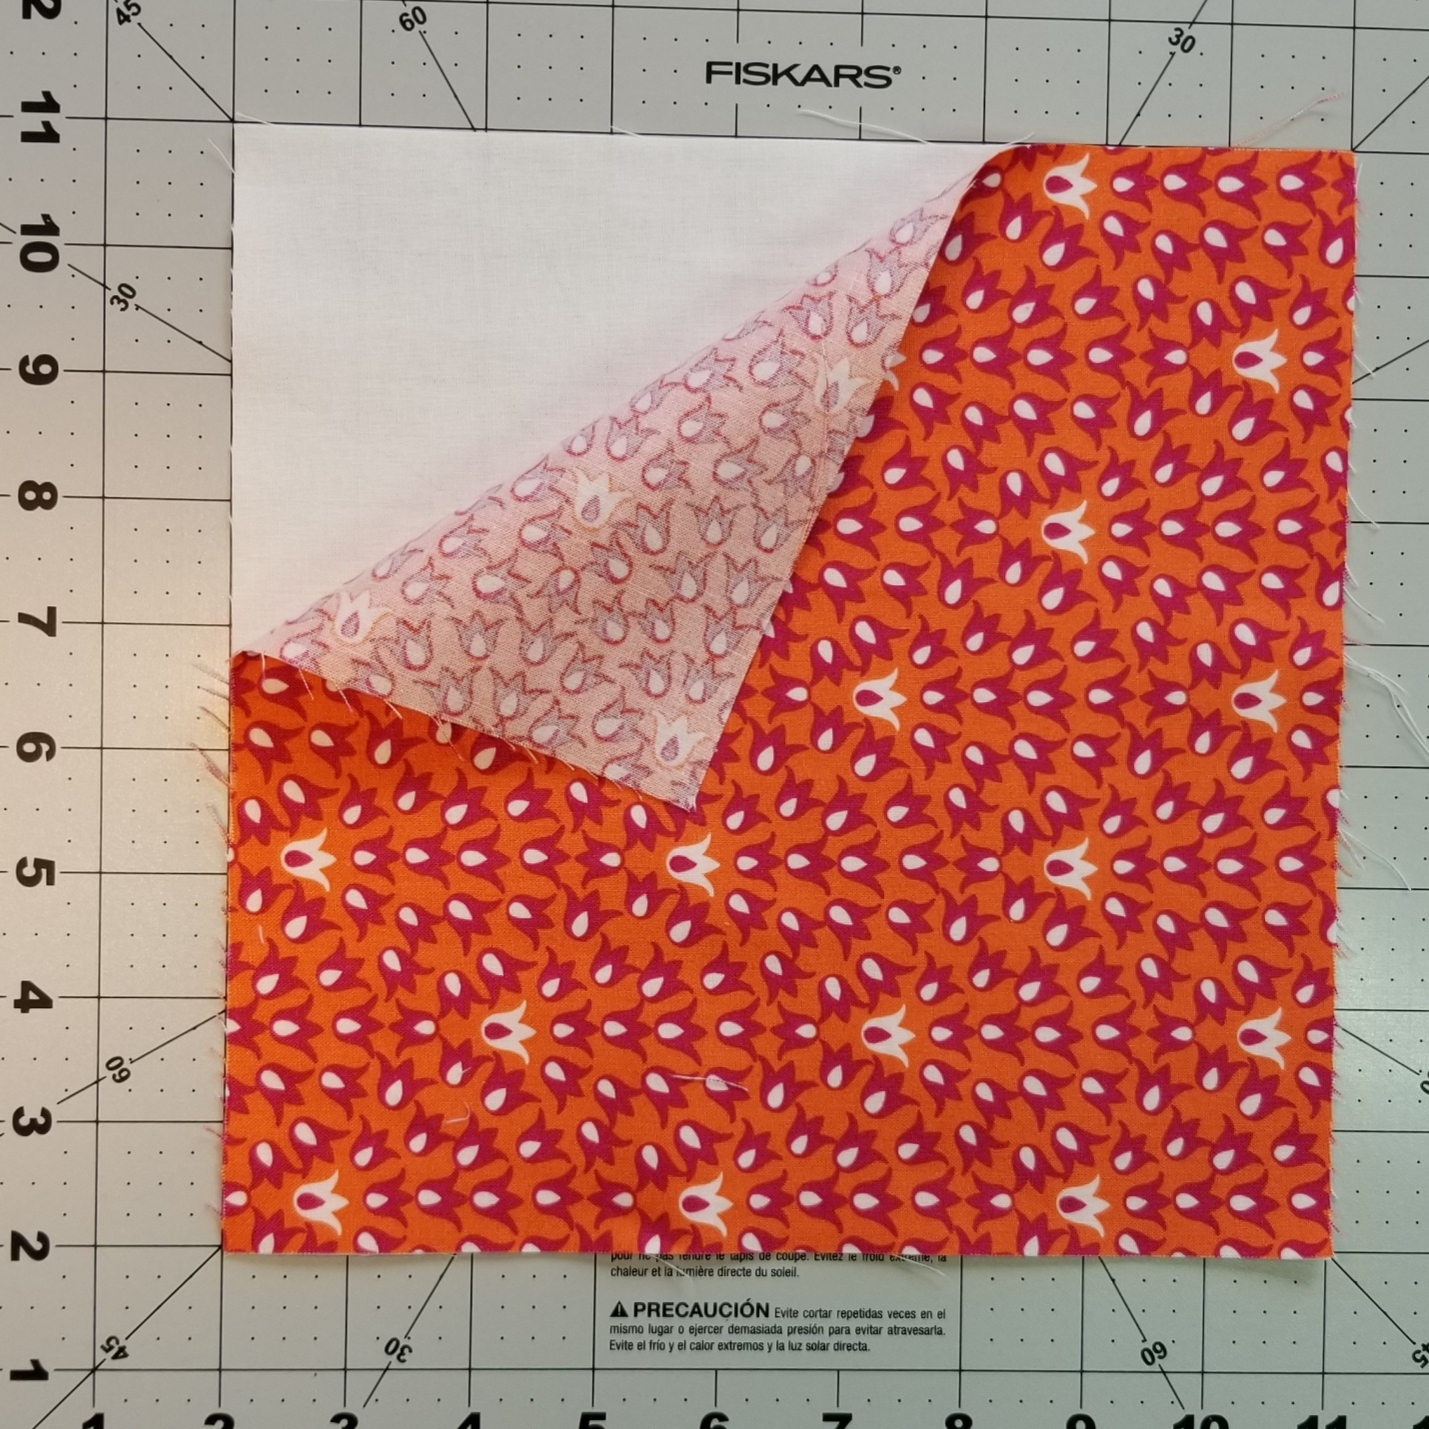
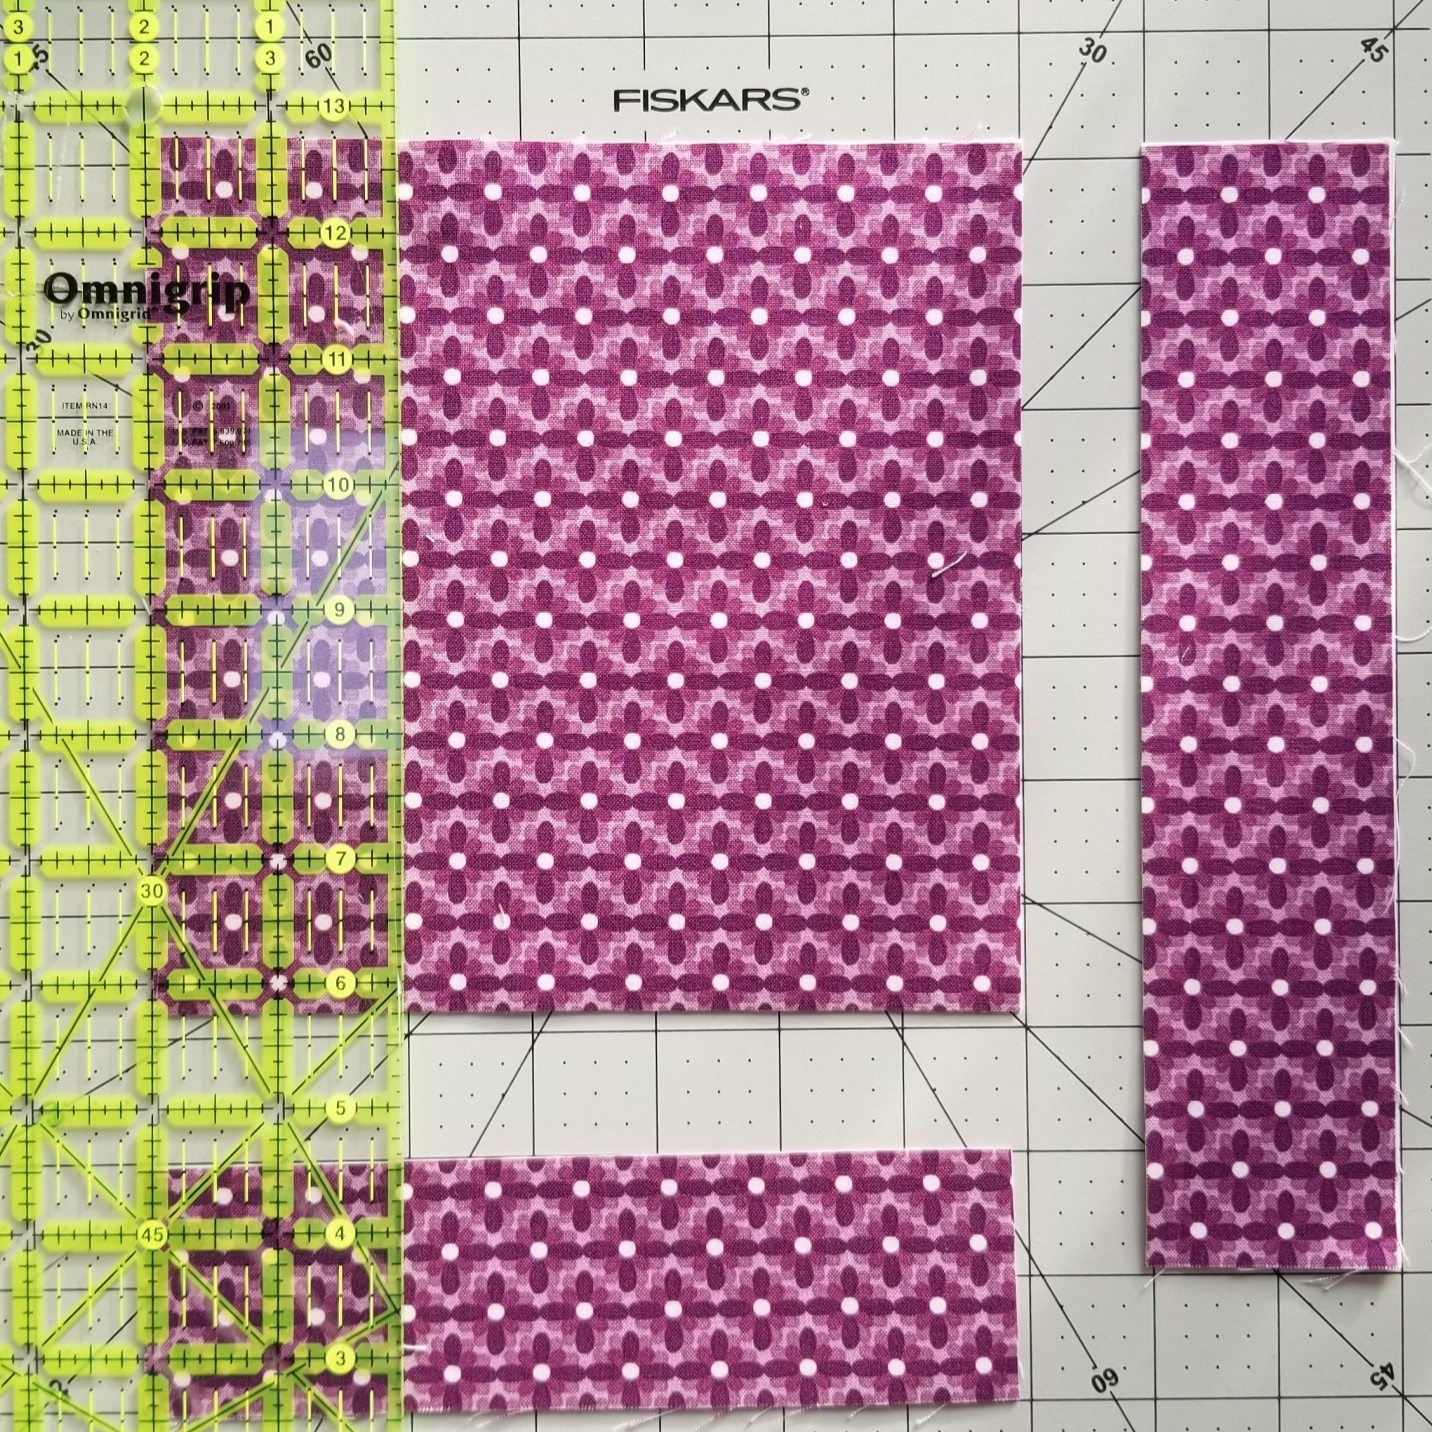
Cut all ten fat quarters into 9″ squares (this is the largest, safest size as fat quarters may be irregular)
This project can also be made with 10″ Charm Squares.
Step one: Select five coordinating print fabrics and five contrasting fat quarters. Sort the ten fat quarters into pairs, one light, one dark.
Step two: Cut one pair of fat quarters at a time, into 9 inch squares. You will have four dark, four light.
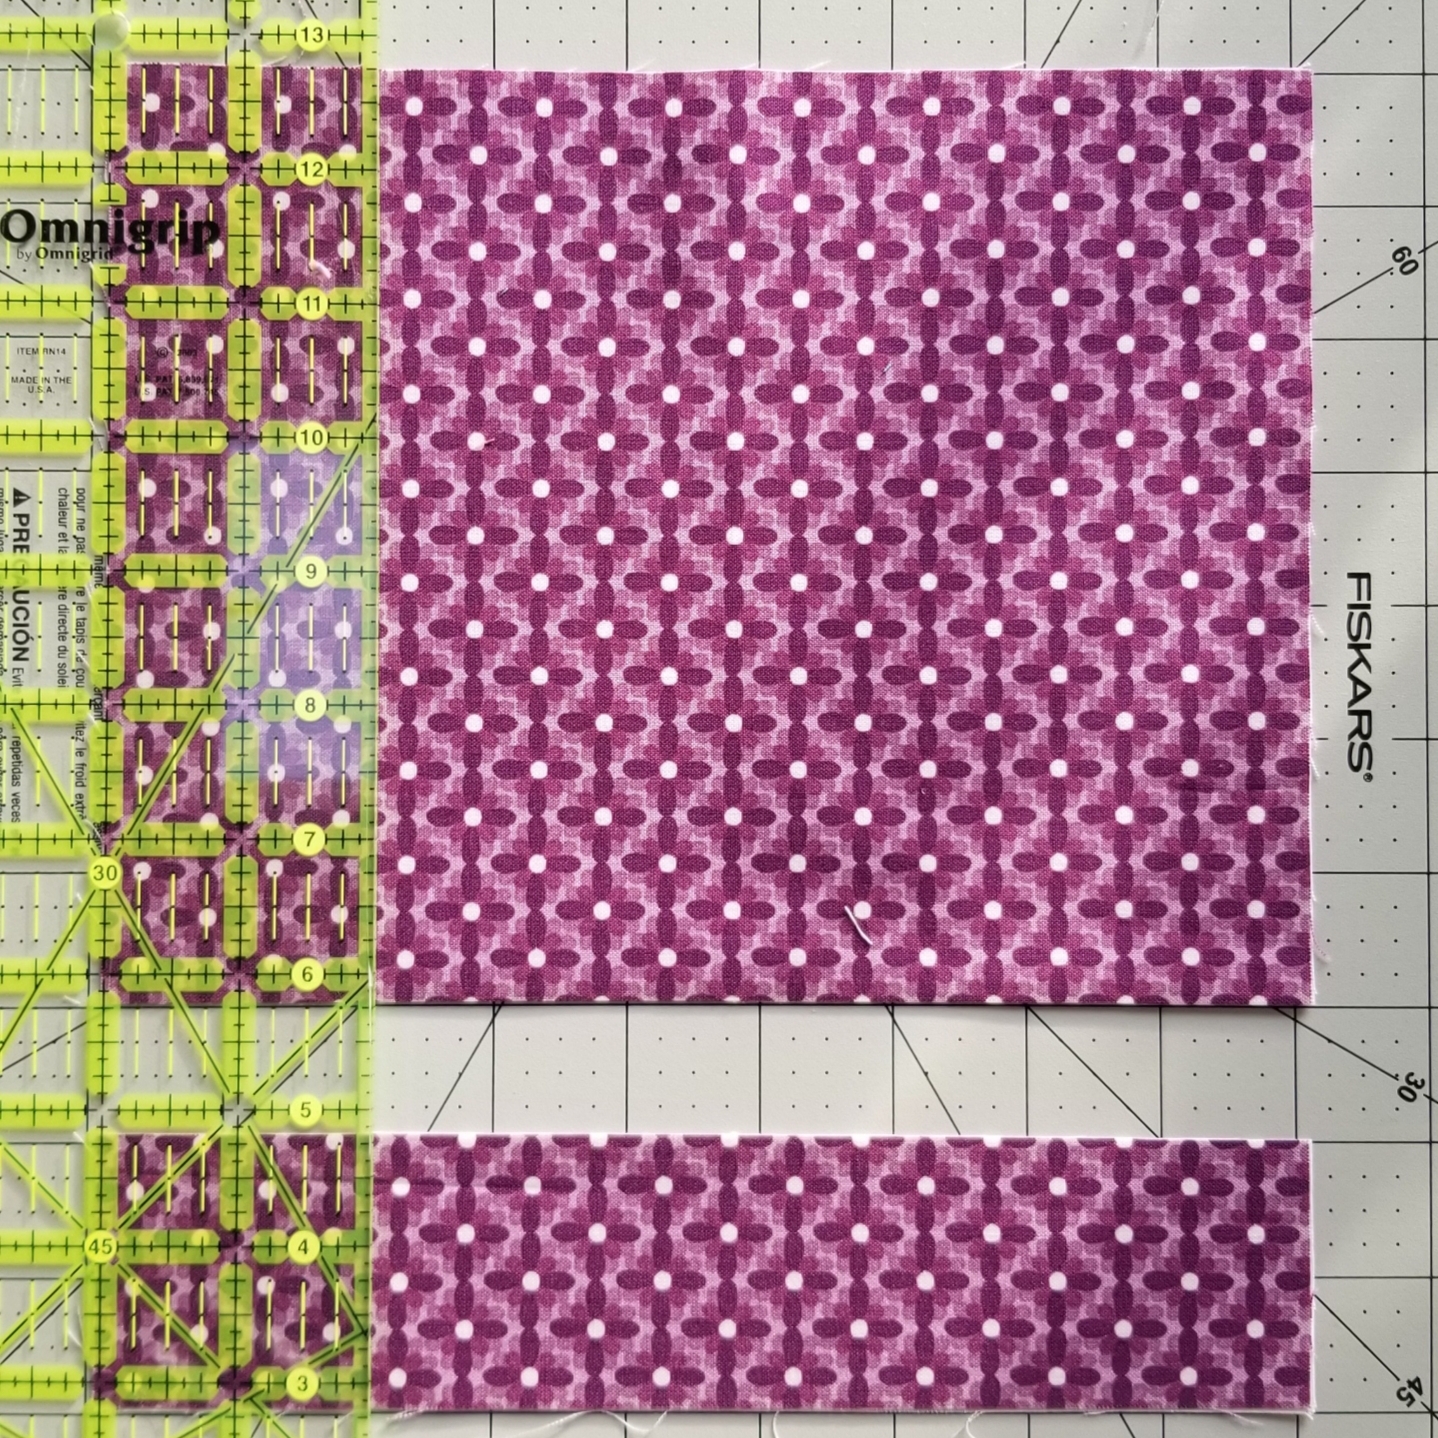
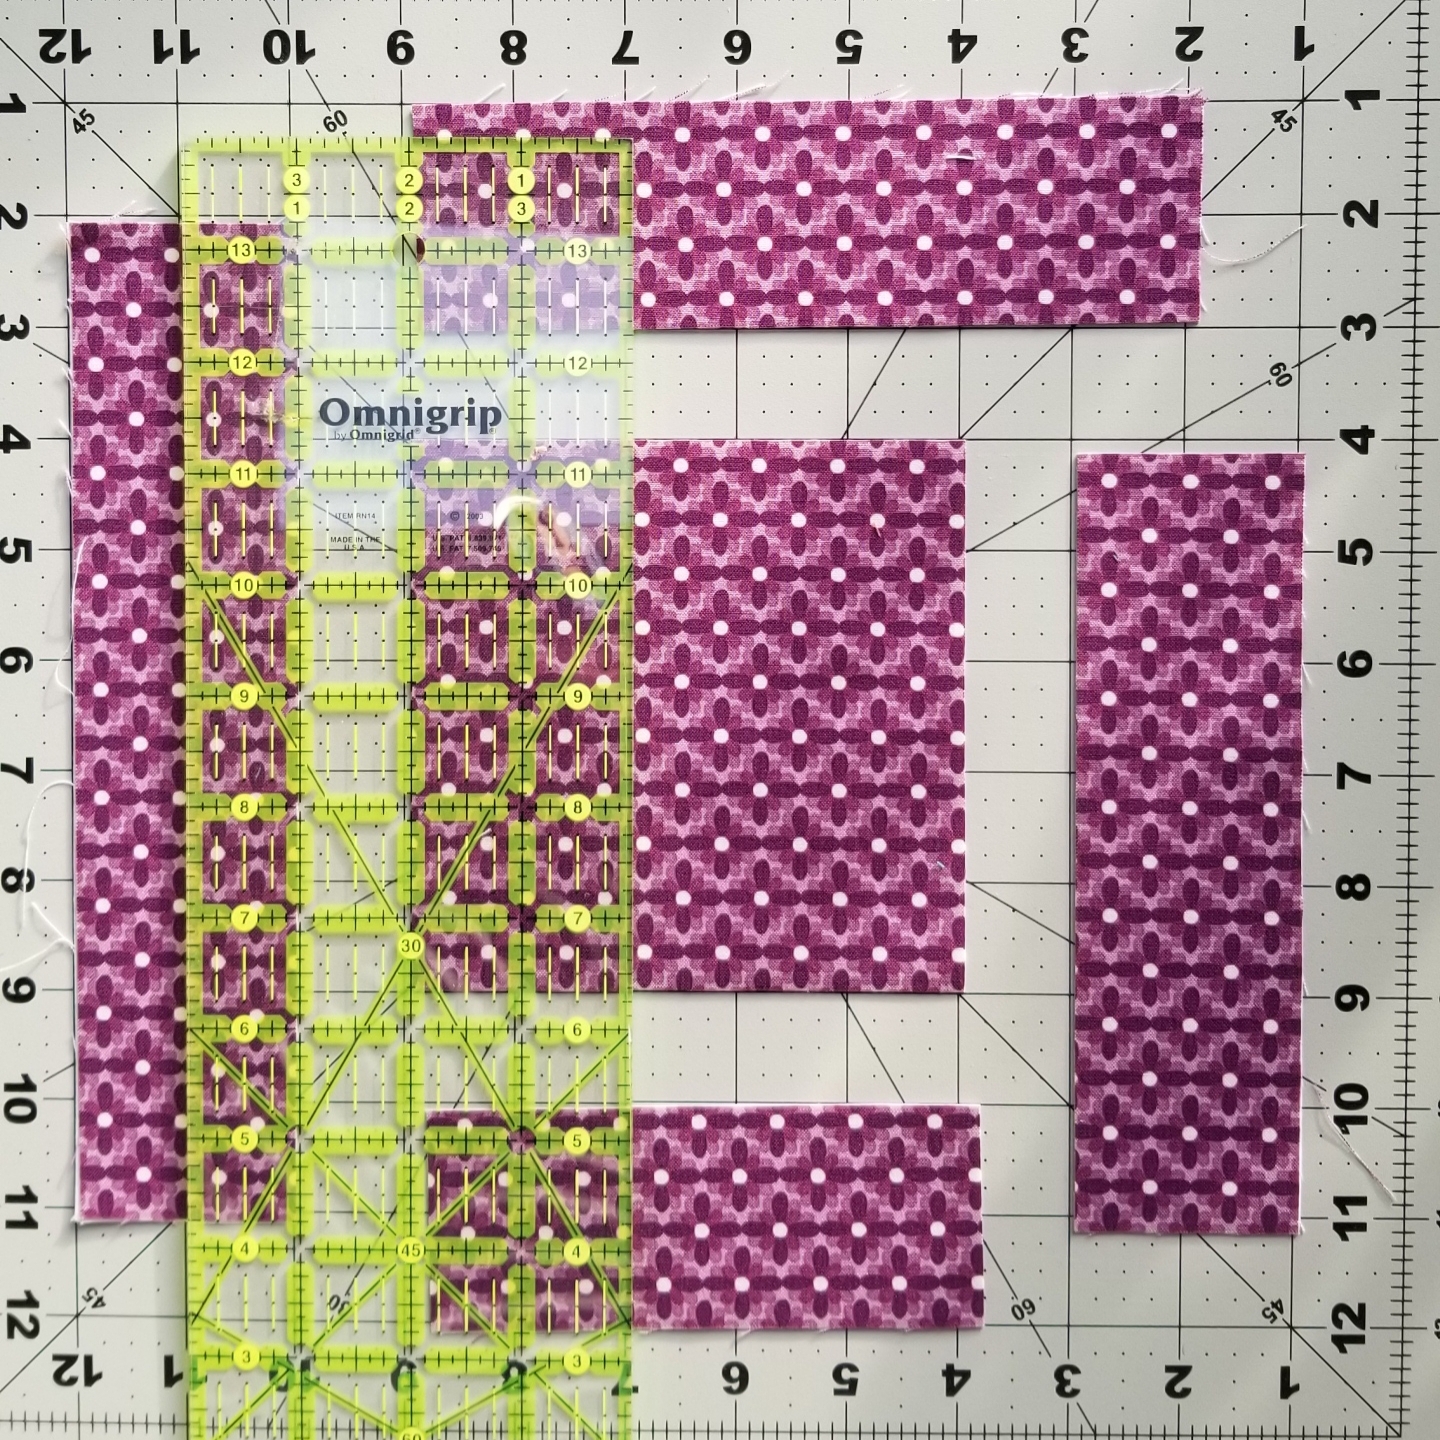
Step three: Place on 9″ x 9″ pair on your rotating cutting mat. Cut a 2″ wide strip off on one side.
Step four: Rotate the cutting mat a 1/4 turn, move the first strip aside and cut a 2″ strip from side two.
Step five: Rotate the cutting mat a 1/4 turn, move the second strip aside and cut a 2″ wide strip from side three.
Step six: Rotate the cutting mat a 1/4 turn, move the third strip aside and cut a 2″ wide strip from side four.
Step seven: Continue to cut and rotate until you have a 3″ square remaining.
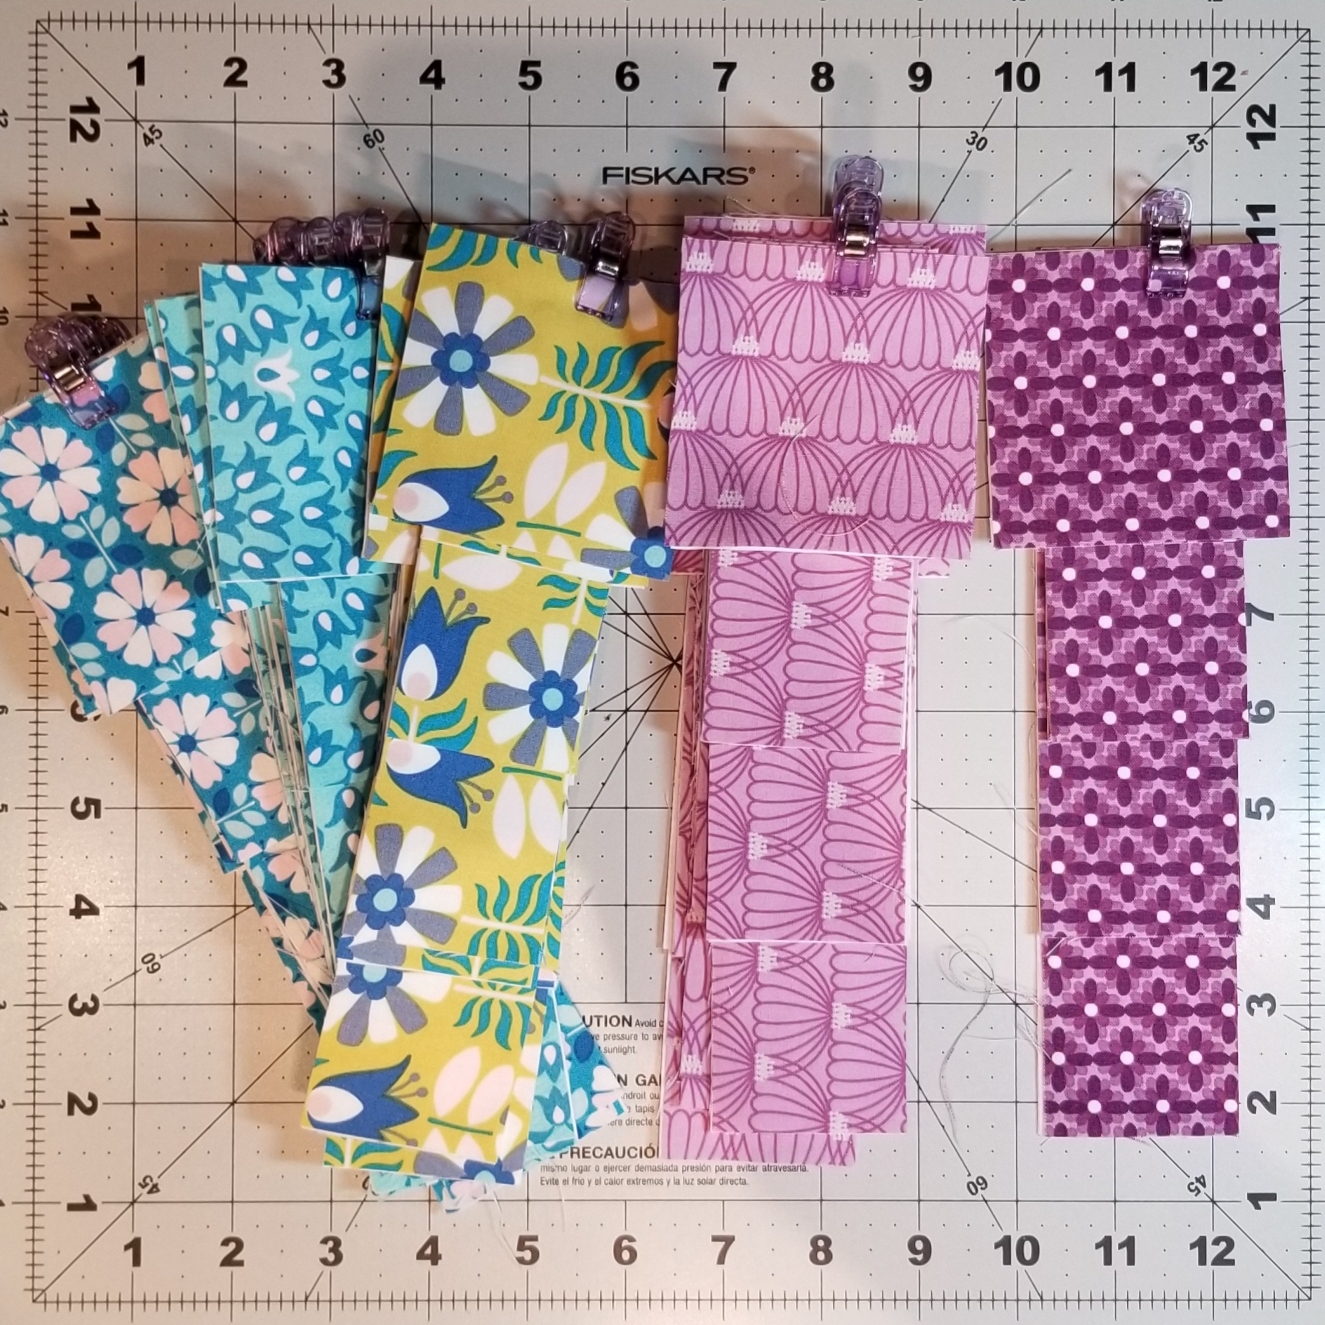
Step eight: Cut all pair of 9″ x 9″ squares in this manner. Do not mix. Keep each pair of cut blocks together, by using a “Clever Clip”
Step nine: Set up your sewing machine with a 1/4″ foot and a new Microtex size 80/12 needle. You cut the blocks from the outside in and now you will sew the blocks together from the middle to the outside.
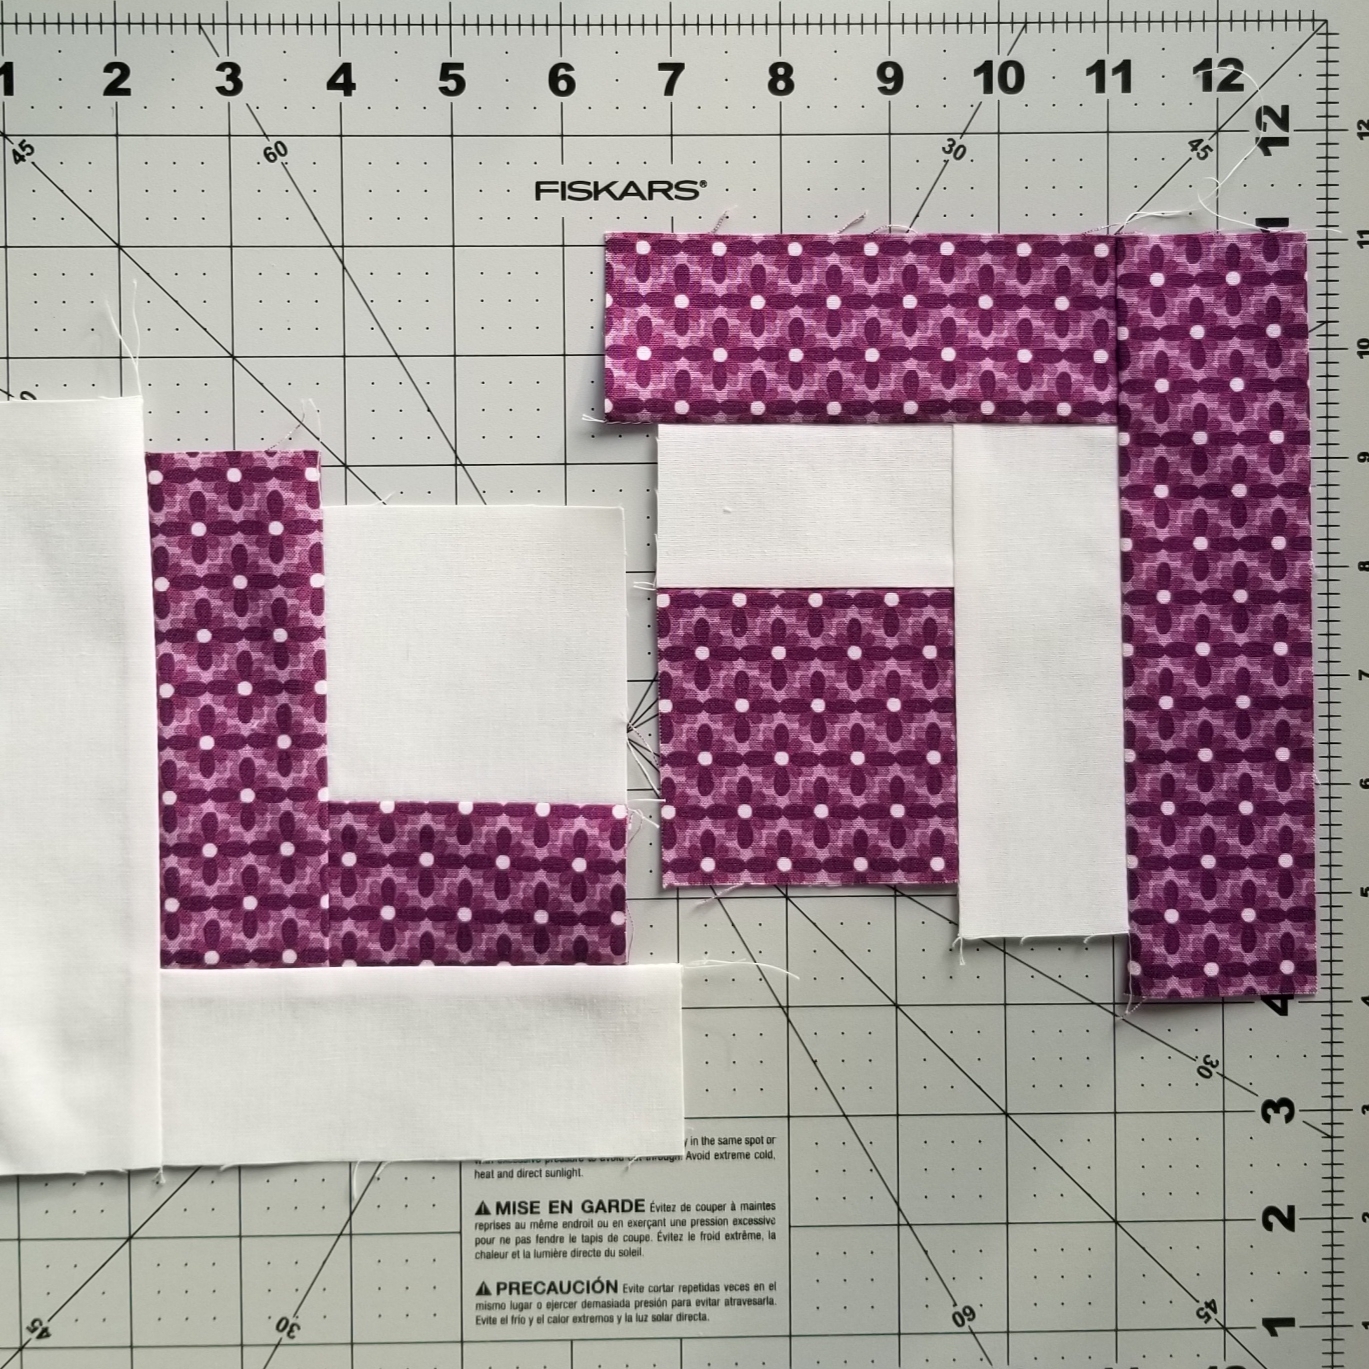
Place a light 2″ x 3″ strip on the dark 3″ square and stitch a 1/4″ seam on one side. Do the same with the dark 2″ x 3″ strip and the light 3″ square. Finger press. Follow the pictures above and sew the same fabric, 5″ strip to the adjacent side.
Add the second and third rows always alternating light and dark after each row. Note in the pictures above that the strips extend 1/2″ on two side of the block onlys. Add each additional strip starting from the same corner. This will assure that the 1/2″ extensions, to be trimmed, will only be on two sides.
One fat quarter yields four blocks, ten fat quarters will yield 40 blocks. More fat quarter, more blocks. When my quilt is finished, I will post the picture here. Have fun!
After I made “Scrappy the Happy Quilt” a Modern Scrap Quilt, I had leftover background fabric. Not wanting to waste such large pieces of leftover background fabric, they became my next scrap project!
You will need:
25 irregular sized leftover background fabric pieces (from “Scrappy the Happy Quilt” a modern scrap quilt)
Scrap strips of print fabric about 2.5″– 3” wide and about an inch longer that the irregular background pieces
1 ½” wide strips of background fabric
Let’s get started: The steps are pictured above.
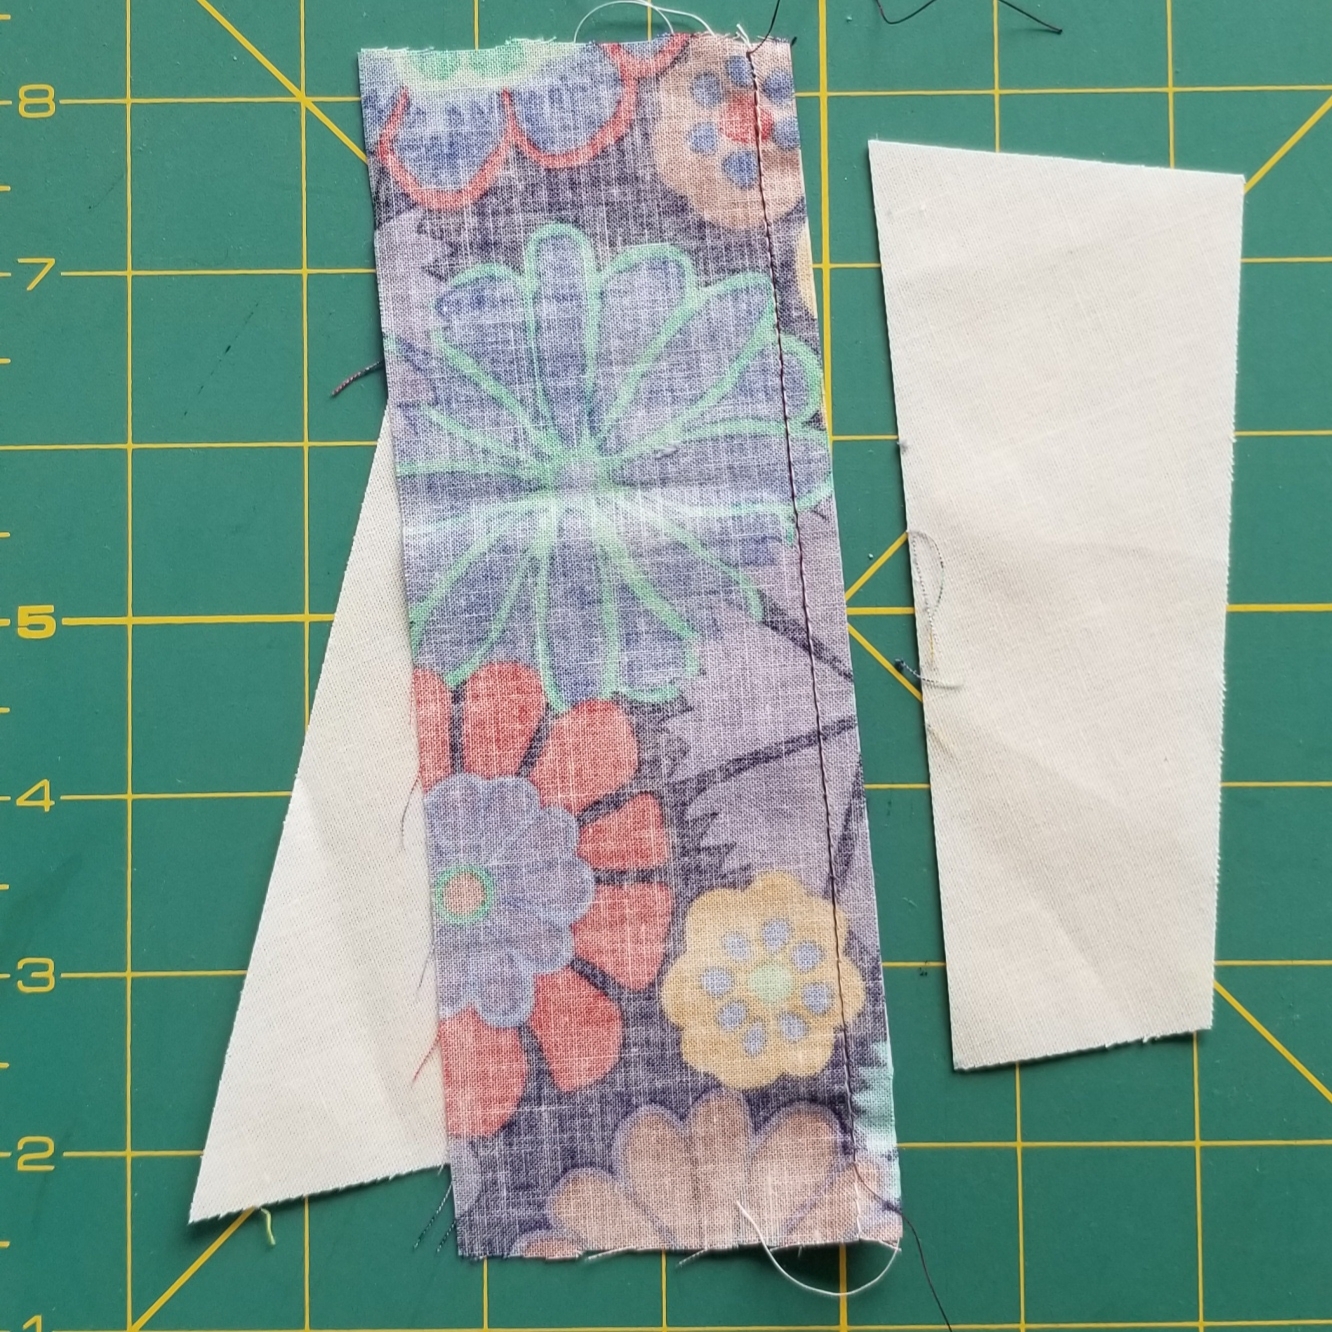
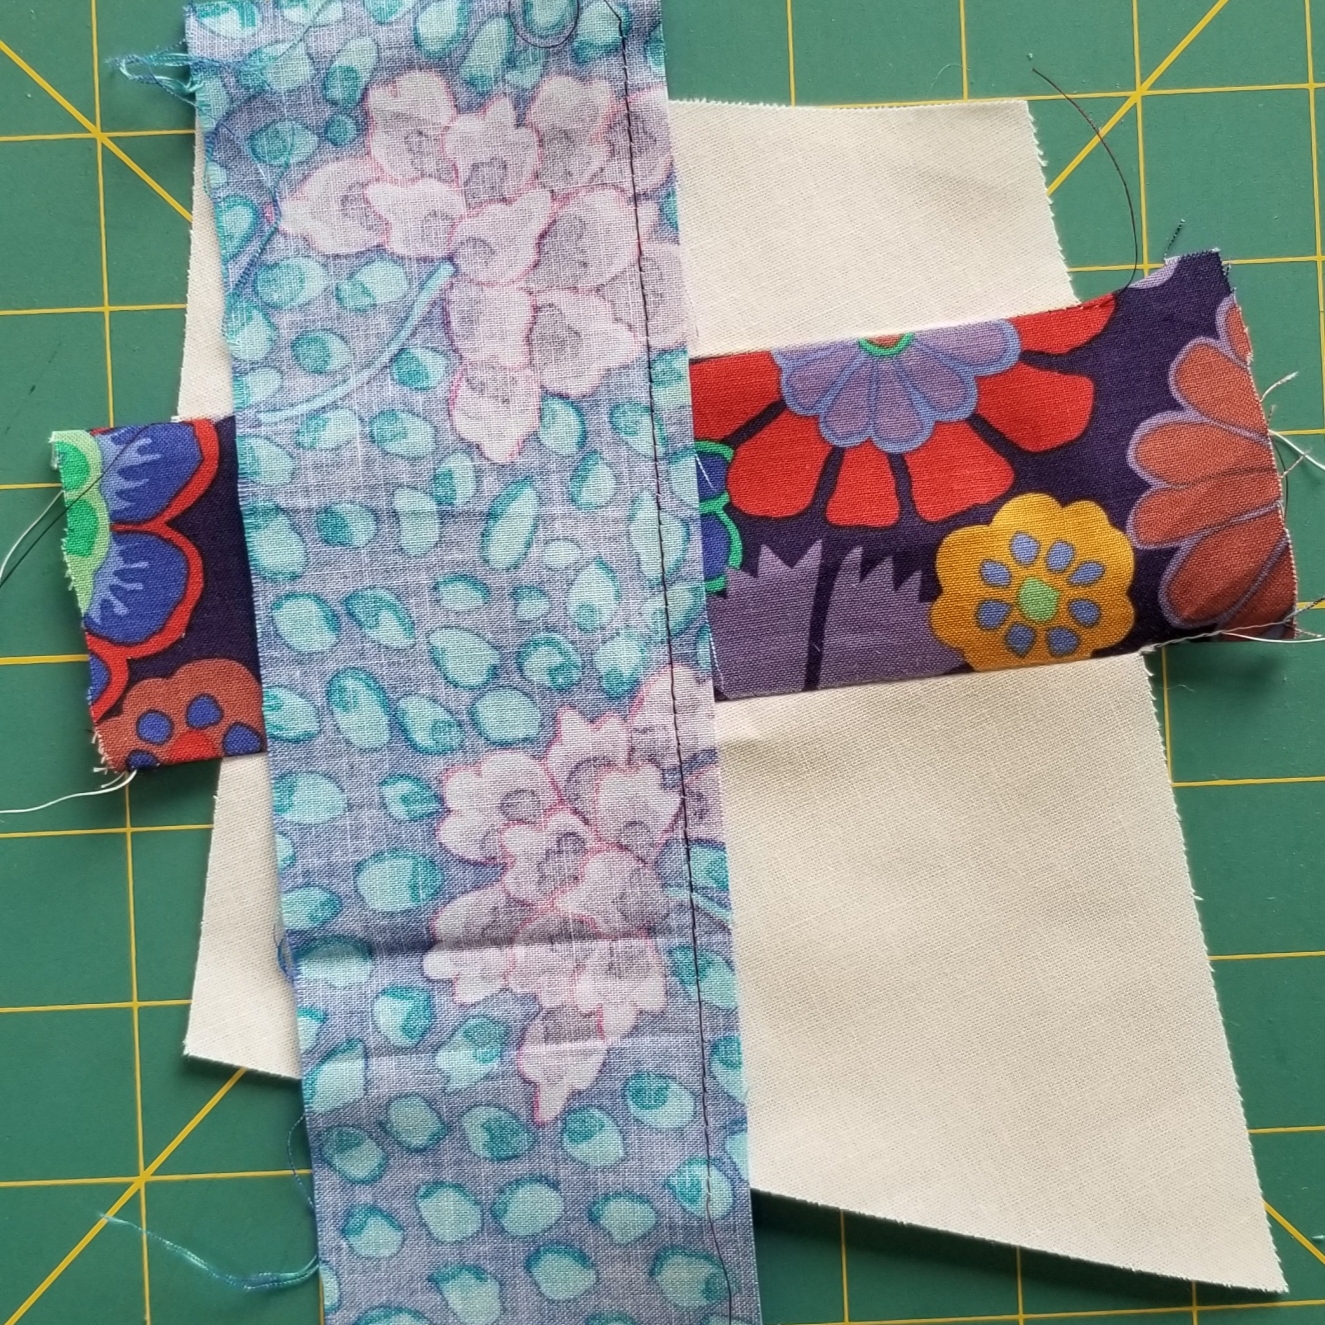
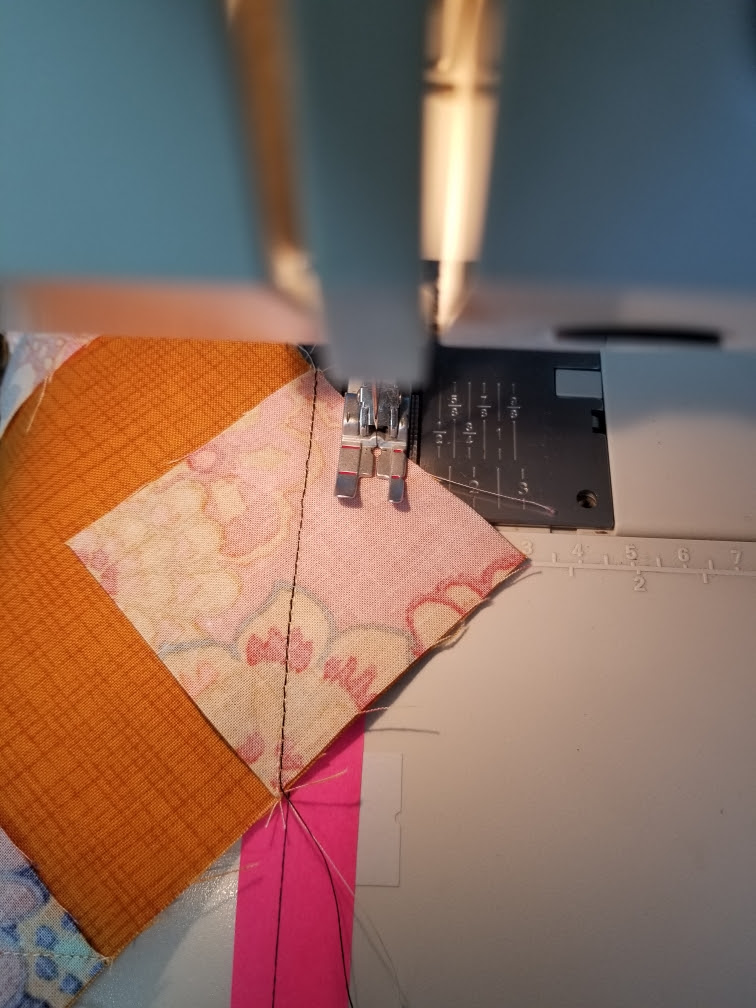
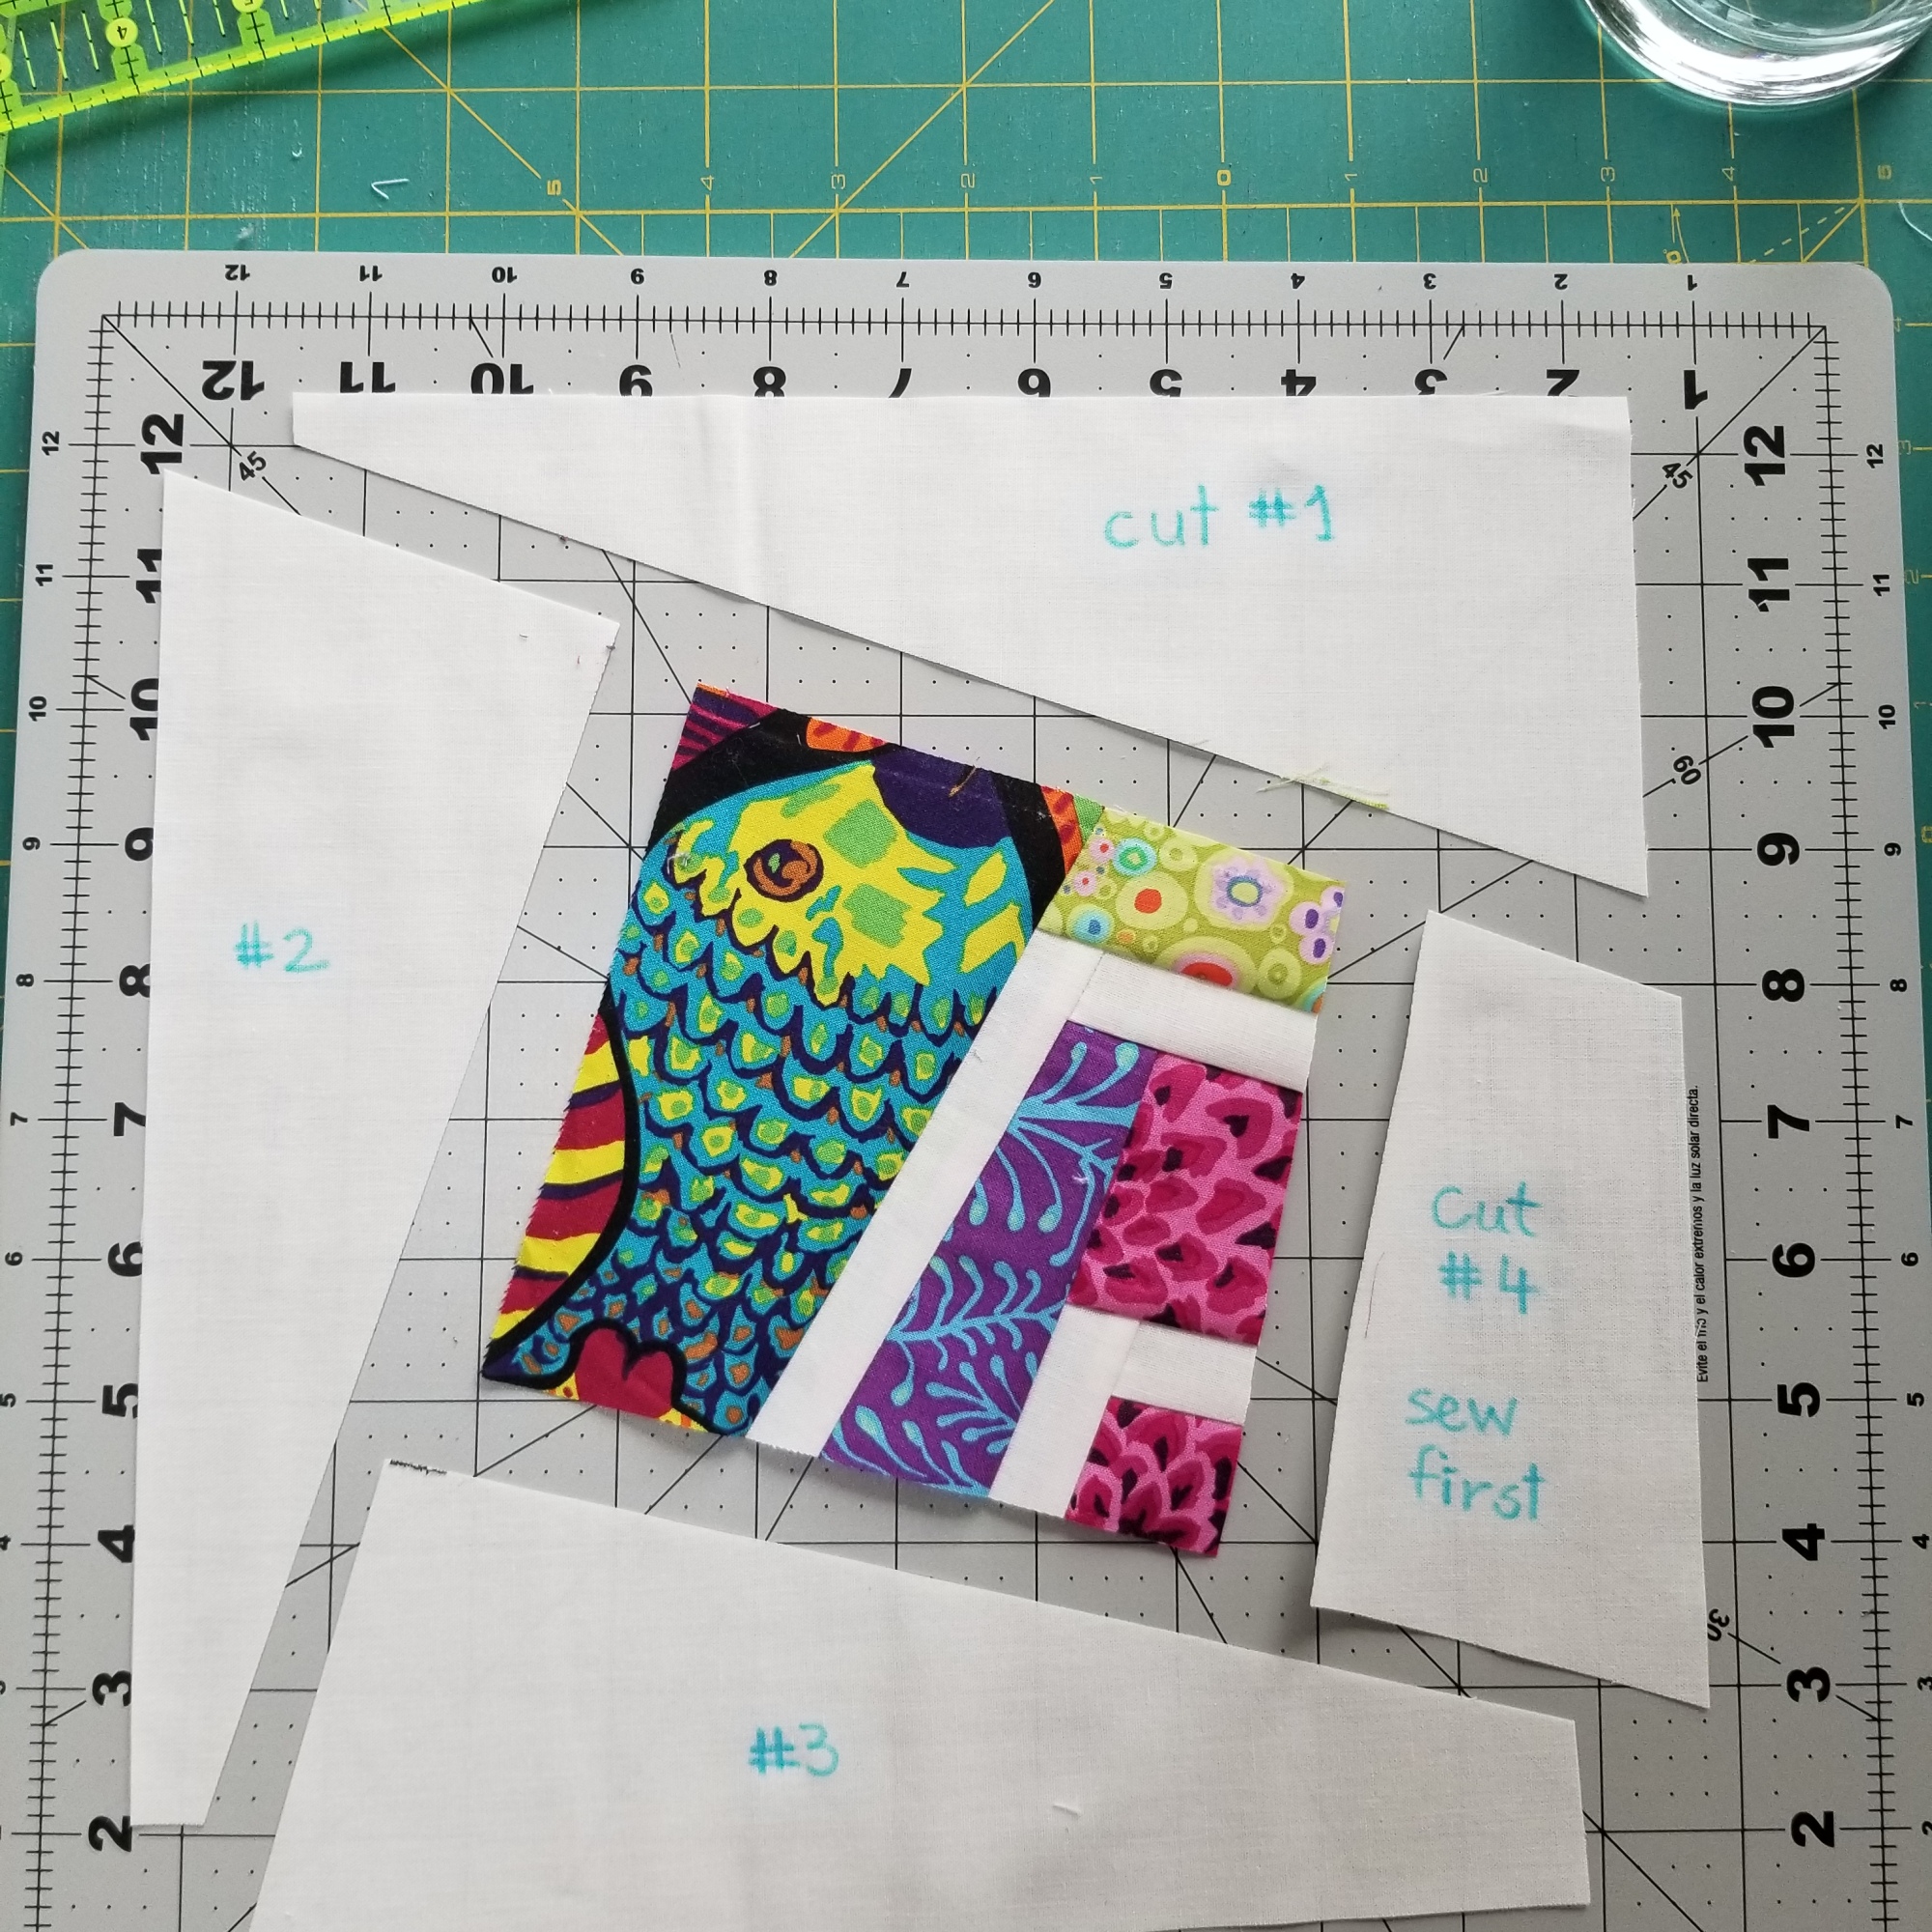
Place a scrap strip on an irregular piece, with one long edge at center. Stitch a ¼” seam along that edge.
Rotary cut along the raw edge of the scrap strip. Finger press the scrap away from the background piece. Reattach the second piece you cut off and stitch it to the scrap strip.
The irregular background fabric now has a scrap print fabric stitched through the middle.
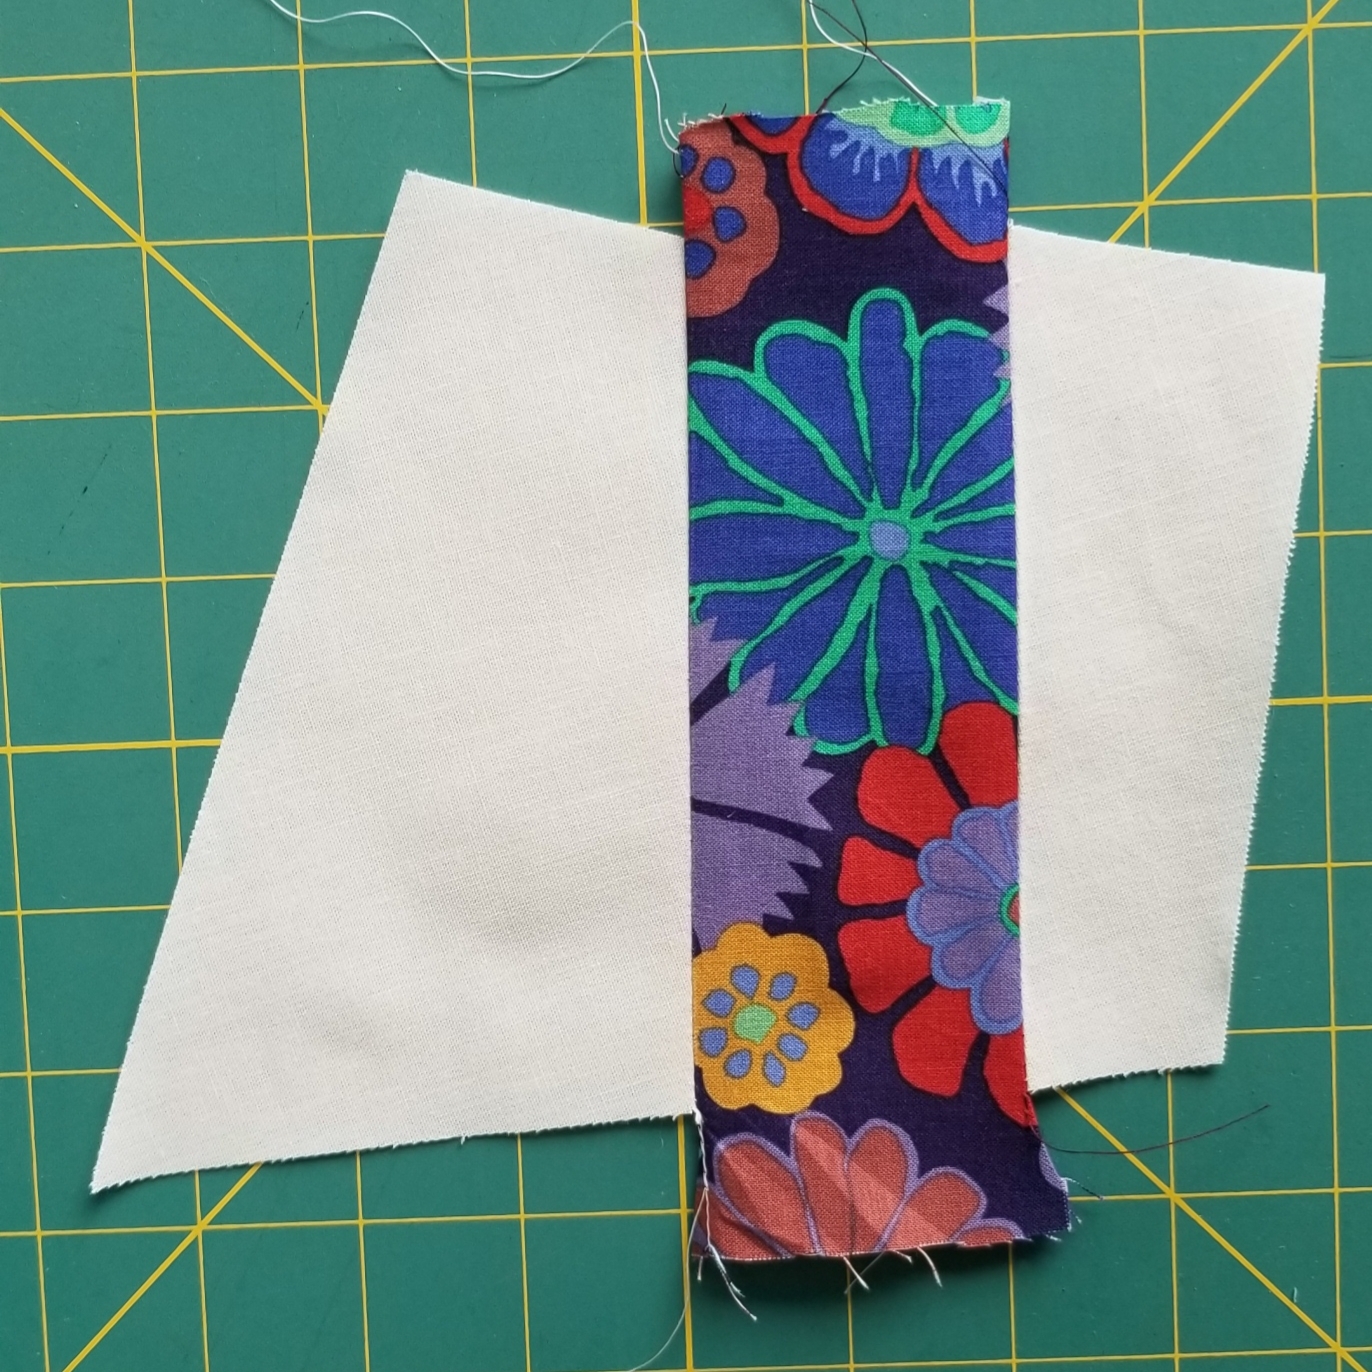
Rotate the block and lay a second scrap strip through the middle of the block with the raw edge of the scrap near the middle. Stitch a ¼” seam along the edge of the scrap strip. Rotary cut along the raw edge of the second scrap strip. Finger press the scrap away from the background piece. Reattach the second piece you cut off and stitch it to the scrap strip.
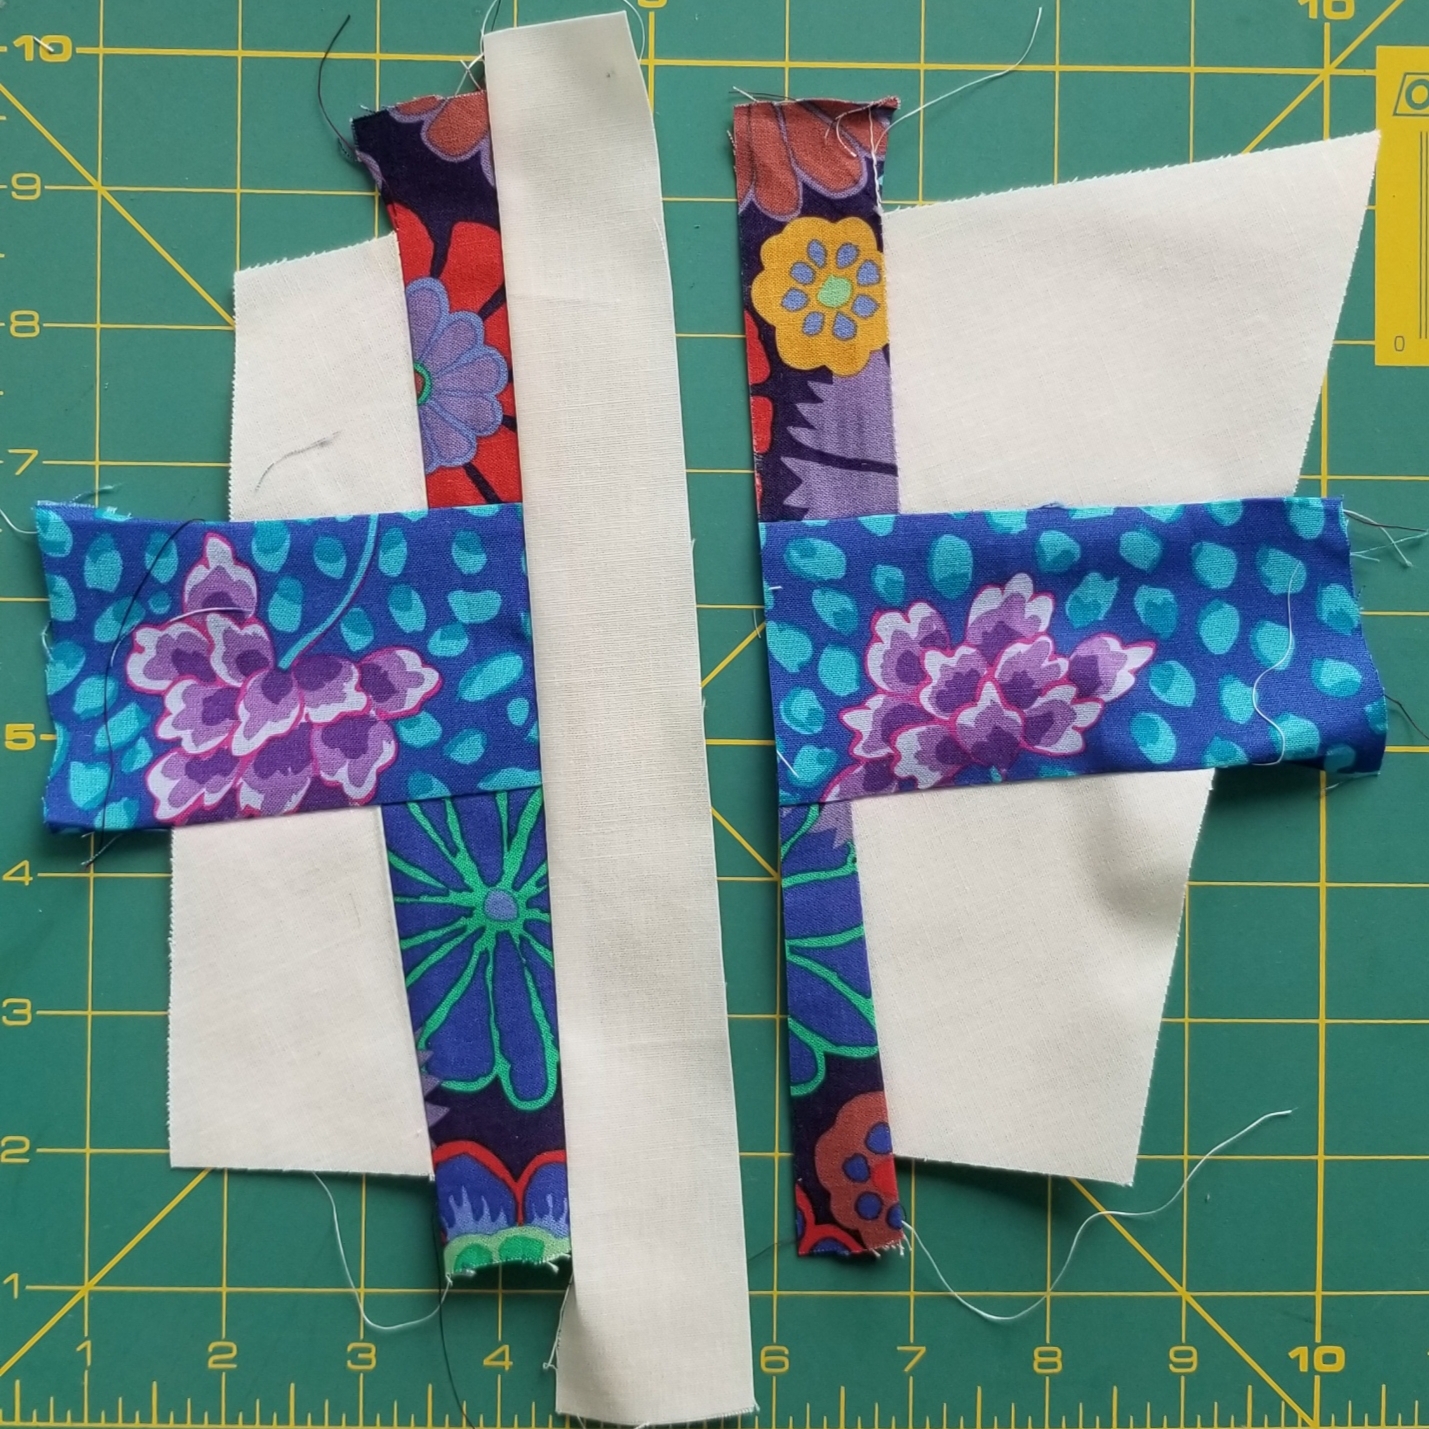
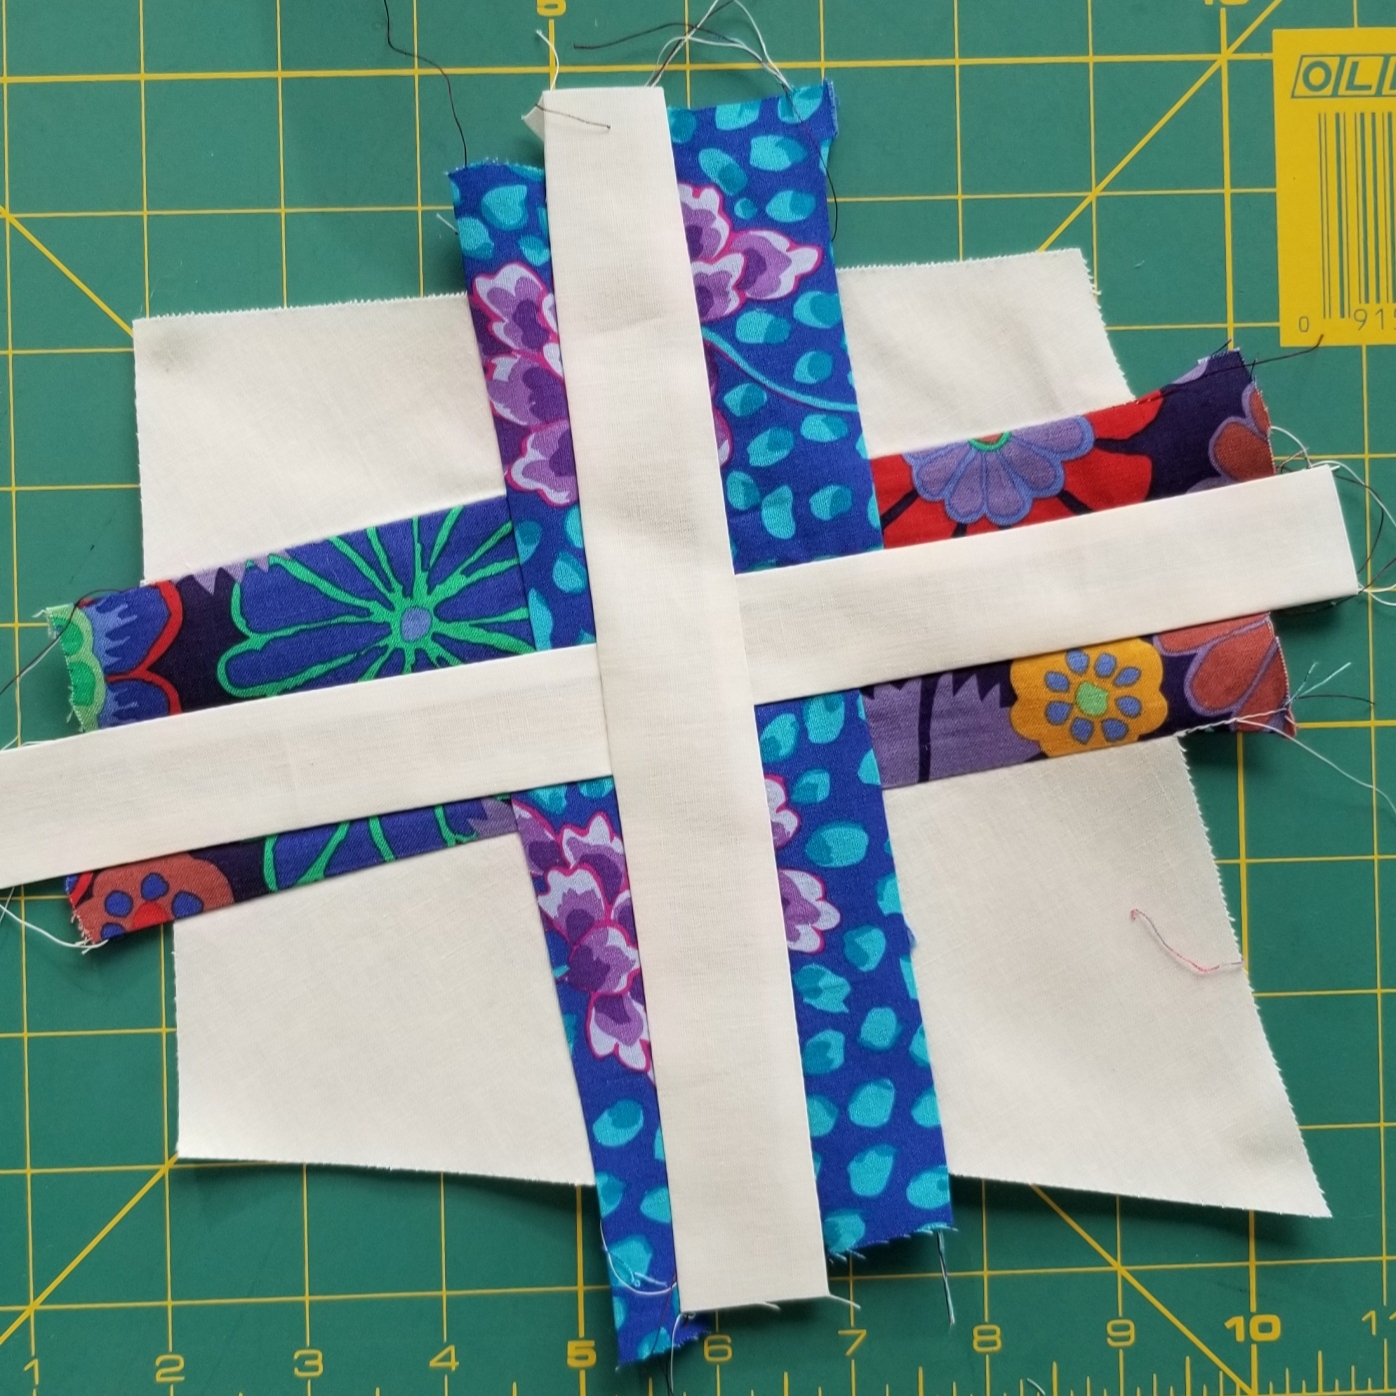
Place a 1 ½” background strip along the middle of the block. Stitch a ¼” seam along the edge of the 1 1/2:” wide background strip. Rotary cut along the raw edge of the background strip. Finger press the background strip and reattach to the cut off piece to make a complete block.
Place a second 1 ½” wide strip of background fabric along the middle of the block perpendicular to the first background strip. Repeat as with the first 1 ½” wide background strip. Note: The second 1 ½” strip is optional.
Square up the blocks to one uniform size. Mine are 7 ½” square. If a block is not wide enough, insert another strip of print fabric to make the square big enough to be cut into the uniform size.
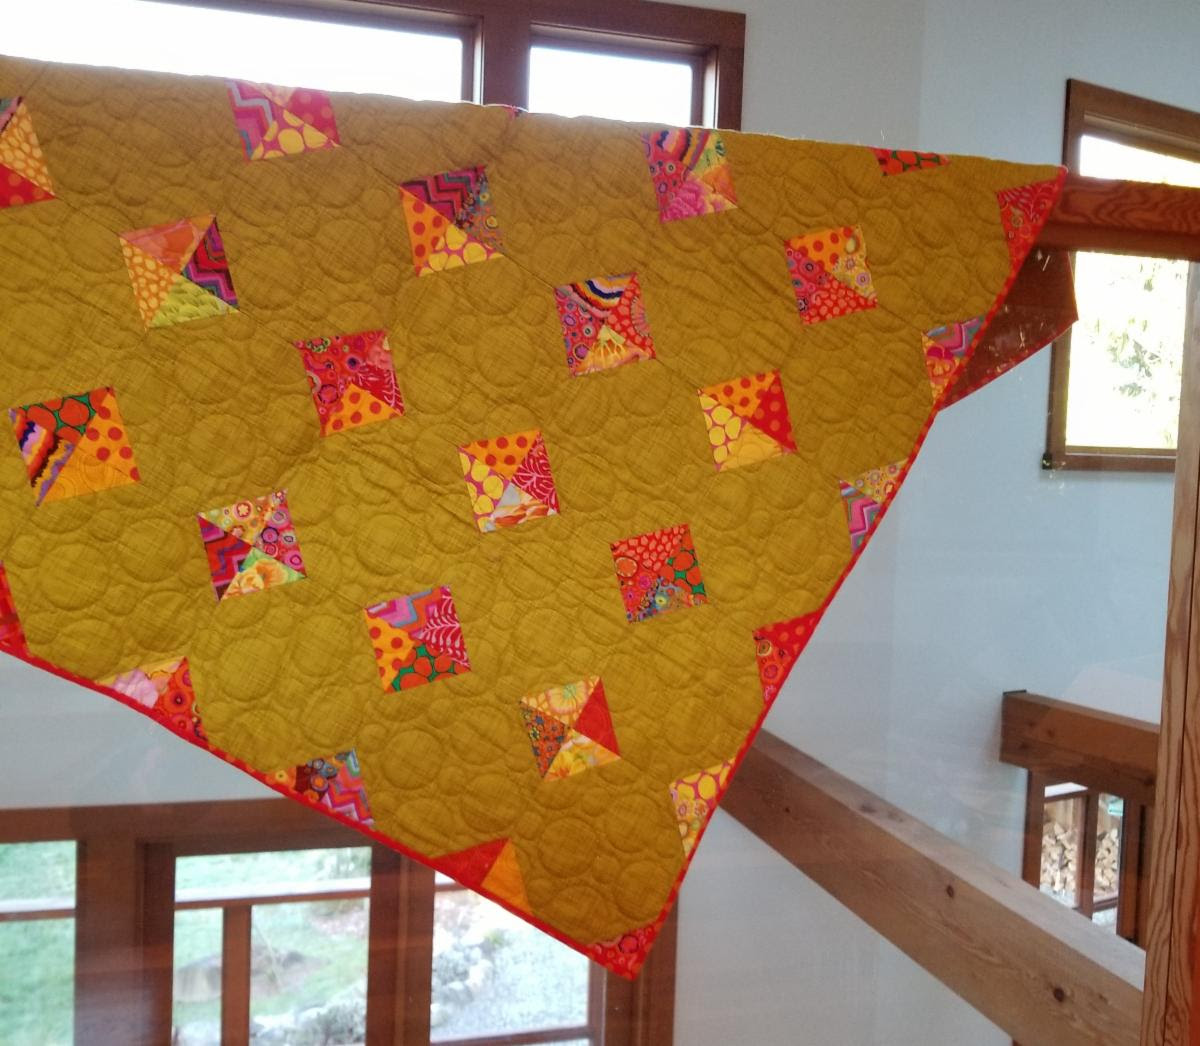
The real fun began after I made the Snowball Quilt.
After making the Snowball quilts I was left with 168 half-square-triangles, each cut from the four corners of the Snowball blocks. From these little itty bitty HST I made a fun table runner. I’ll describe the steps below.
Snowball Quilt – 36″ x 41″ Seven Rows of six blocks Kaffe Fassett 5″ Charm Pack and Northcott’s Dublin for background
You will need:
1 Charm Pack: 42 – 5″ squares for the corners
Cut the charms in quarters to make 168 – 2.5″ squares
42 – 6.5″ squares for background (1.5 metres) You need another 1.5m for the tablerunner below
Short stitch length : 2.0mm
Draw a diagonal line through center of all 168 – 2.5″ squares
Stitch these to all four corners of 42 – 6.5″ of background fabric squares
I recommend that you draw a diagonal line for accuracy
The second row of stitching is about 3/8″ away from the first row of stitching. You can eyeball it, mark a line or use the edge of the presser foot butted up to the first row of stitching.
Optional: use the NEW Grid gripper sheet. It has guidelines for diagonal sewing. It sticks to the bed of your sewing machine Check it out in our shop under the Store – Notions tab.
Trim off all four corners of the Snowball blocks by cutting along the center of the two rows stitching. Press and assemble the Snowball quilt blocks.
This picture shows all the steps to make a Snowball block & the smaller blocks made with the cut off corners
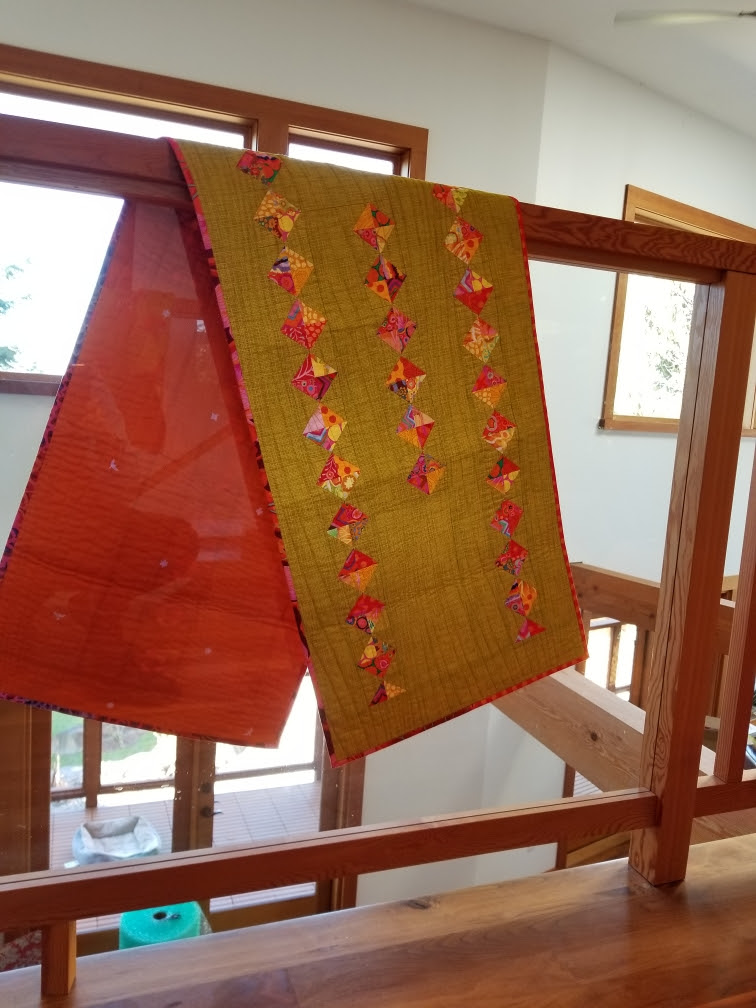
Snowball Quilt Crumbs Table Runner 18″ x 64″
You now have a pile of 168 half square triangles leftover. Press the mini blocks open, pressing half of the seam to the print fabric and half to the background fabric. Stitch the HST into pairs, making sure to use two with opposite-pressed seams You now have 84 blocks. Join a few units to make various length units. I made four units.
Next add a strip of background fabric between rows to increase width and separate the triangles from touching each other. Have fun, there are many possibilities, not just quilts……
Background fabric for grout, background and border, approximately 2 to 4 metres depending on quilt size
Aurifil 50 weight thread for piecing
A new needle: Beissel Microtex 80/12 is my favourite
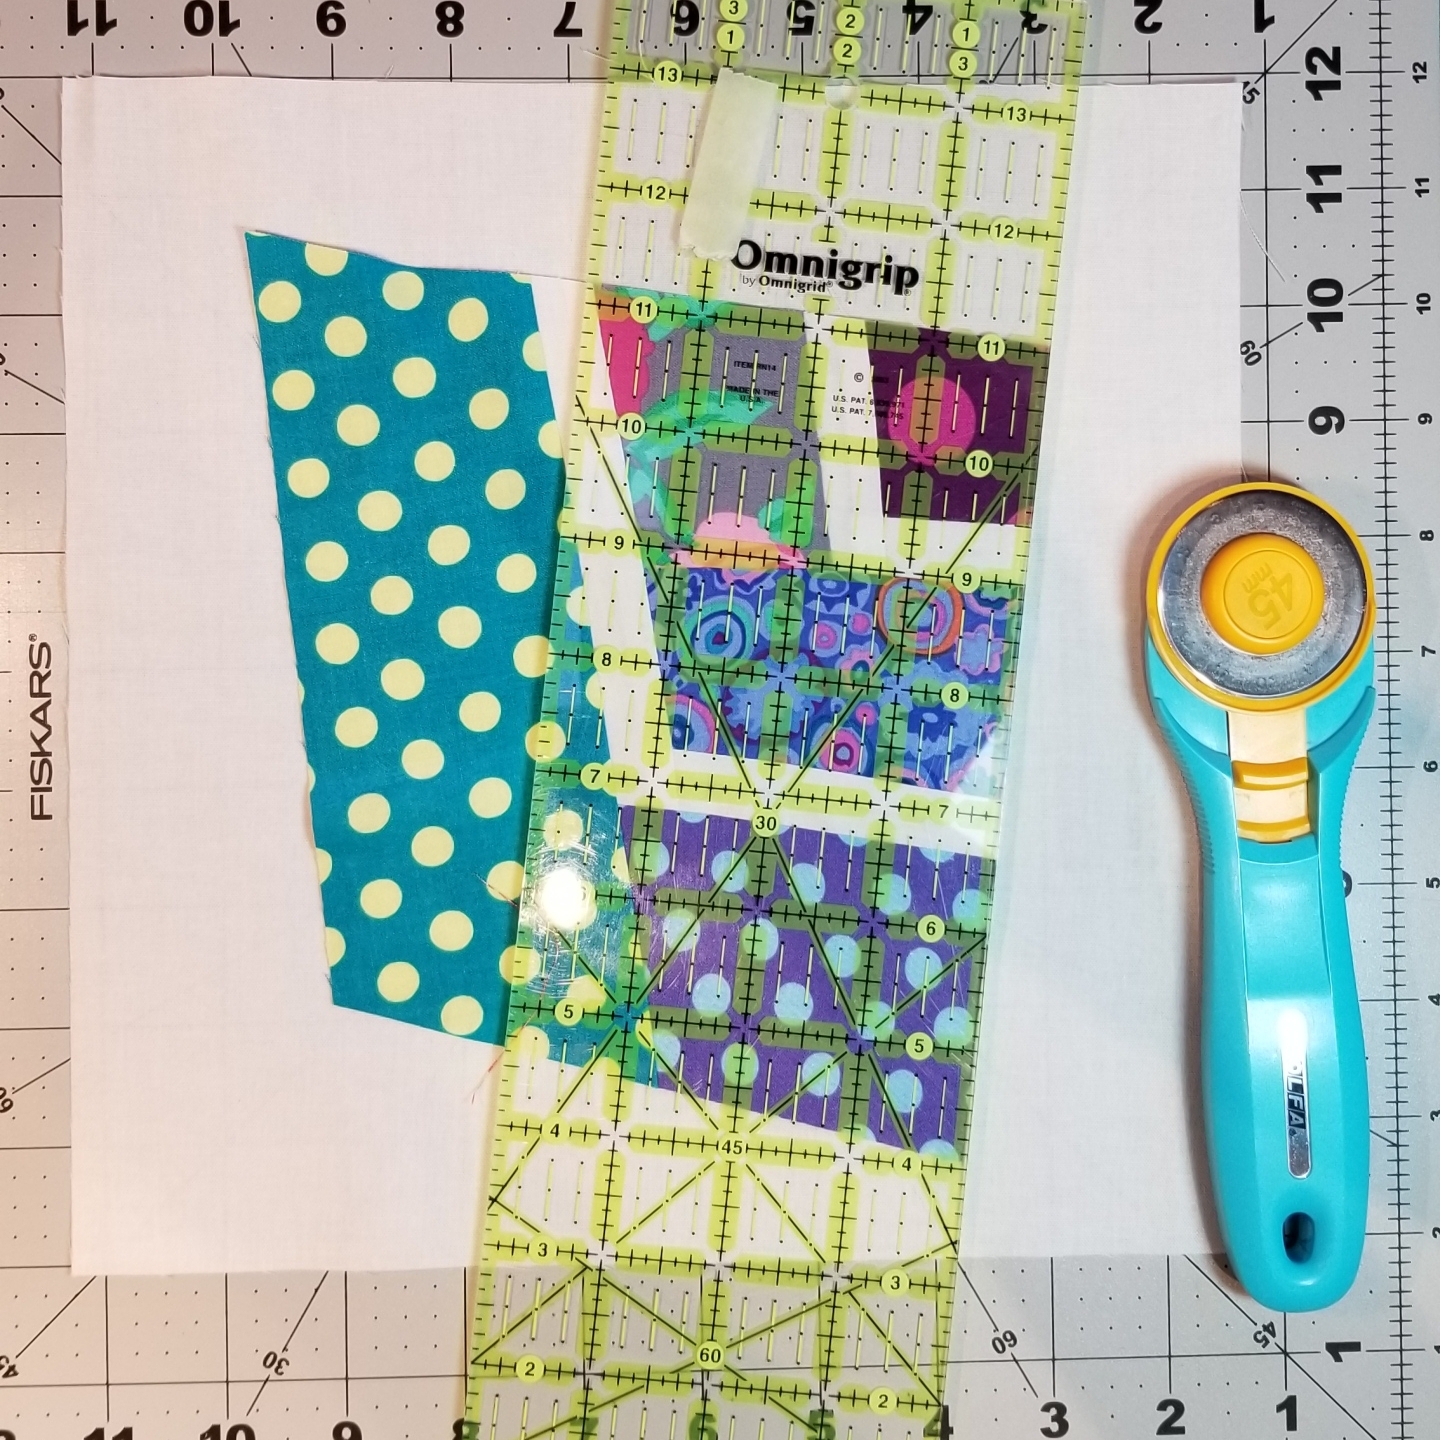
Spray stabilizer, cutting mat (rotating mat is ideal), ruler and rotary cutter, wool pressing mat
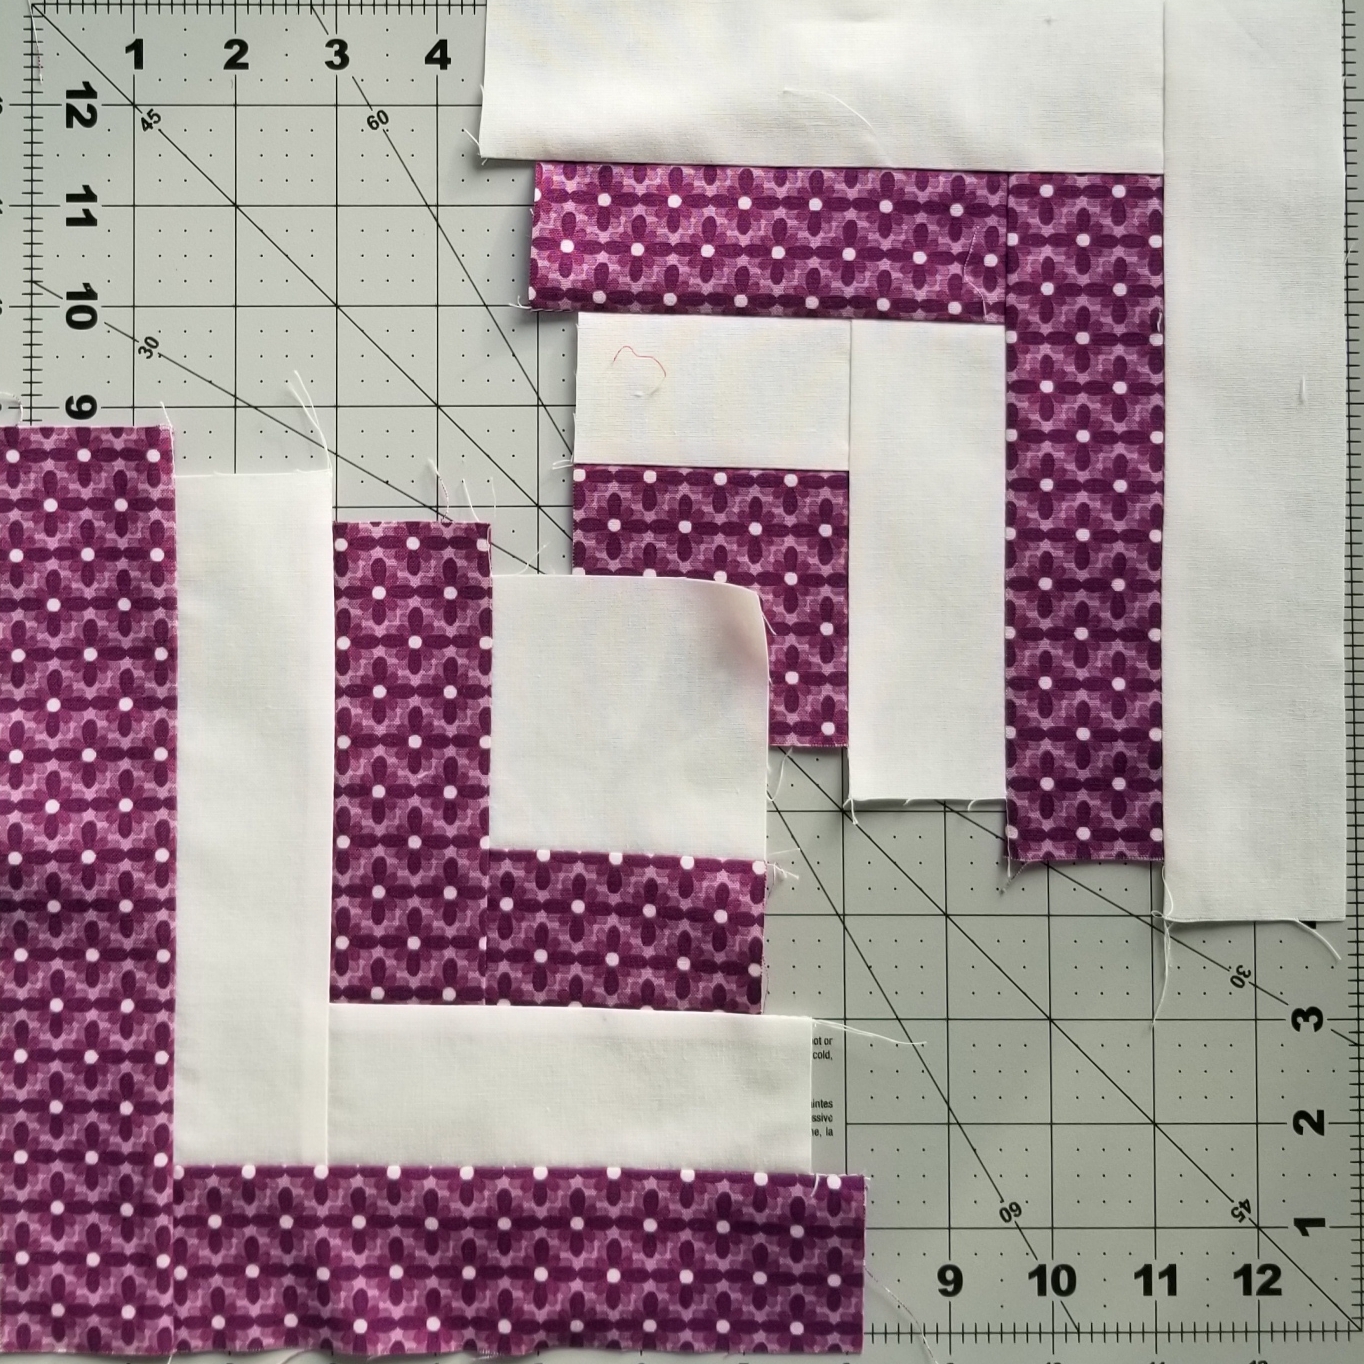
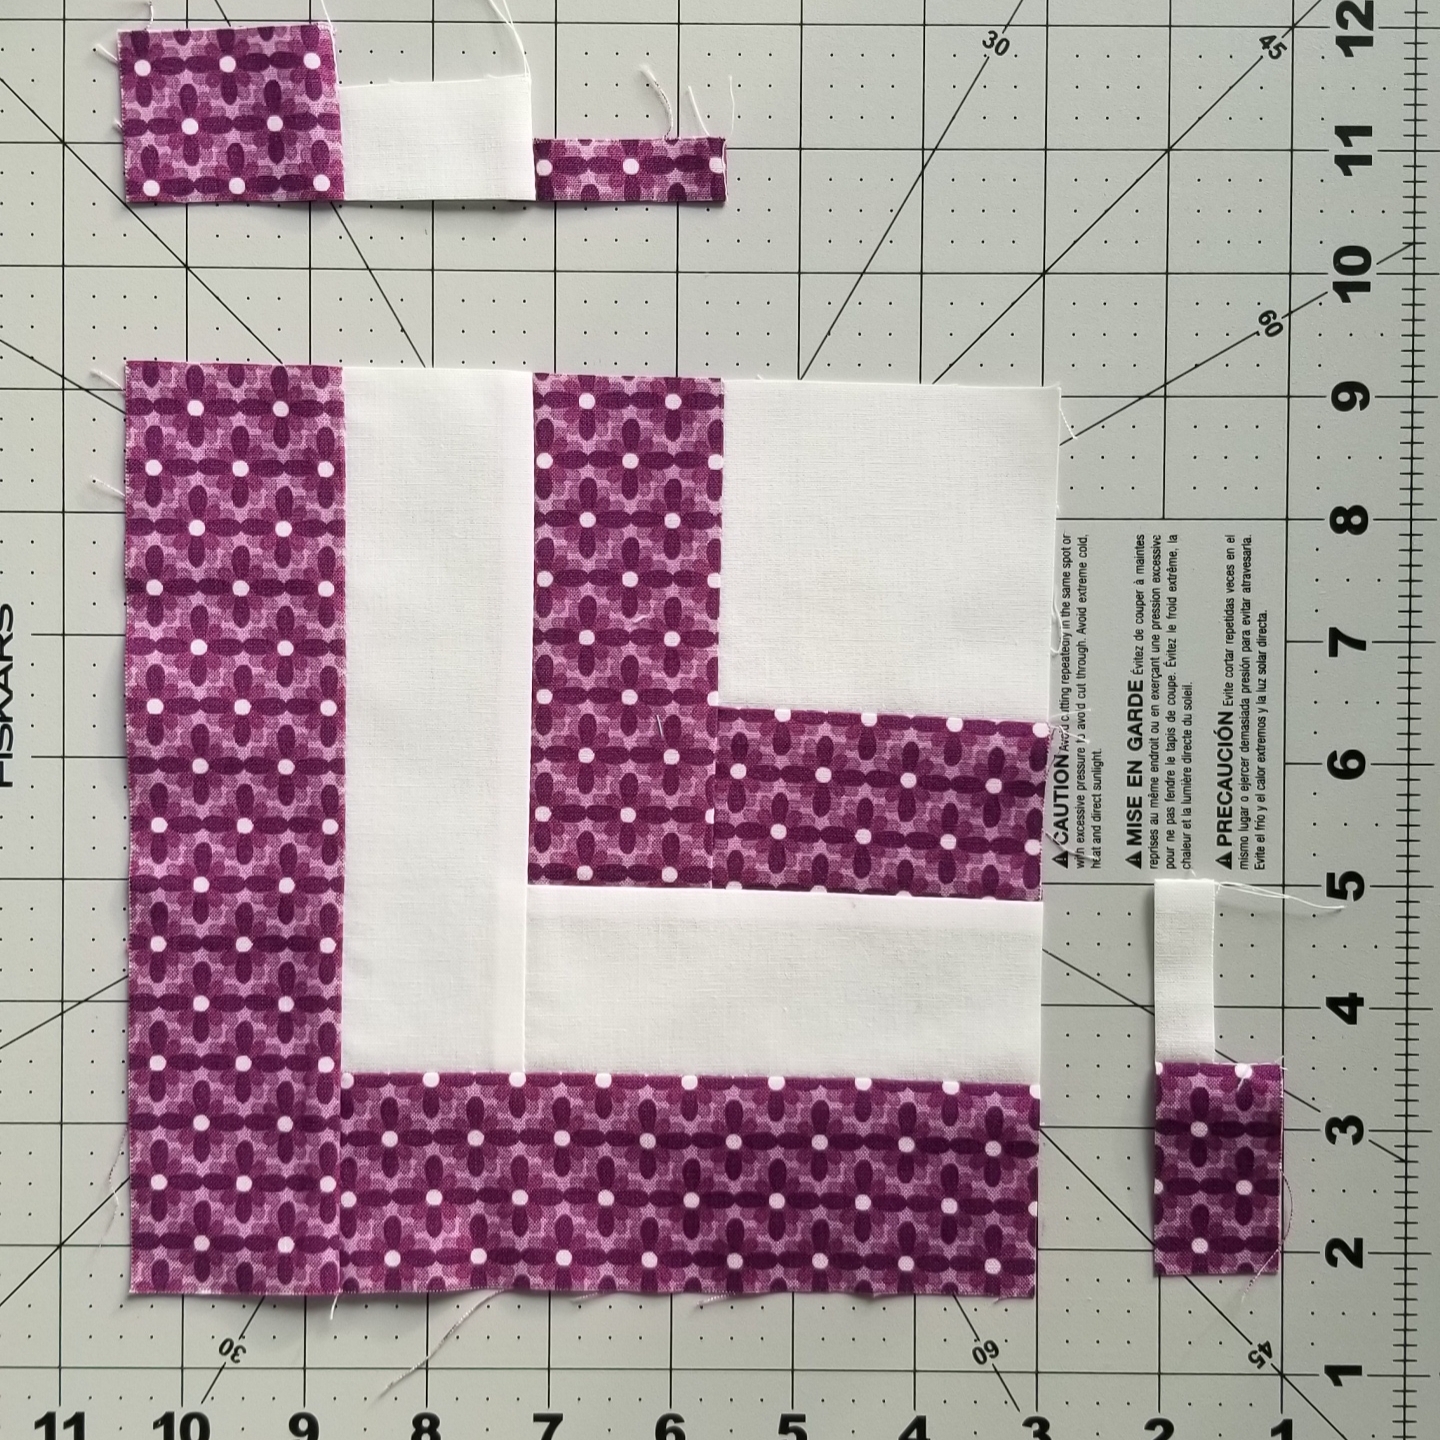
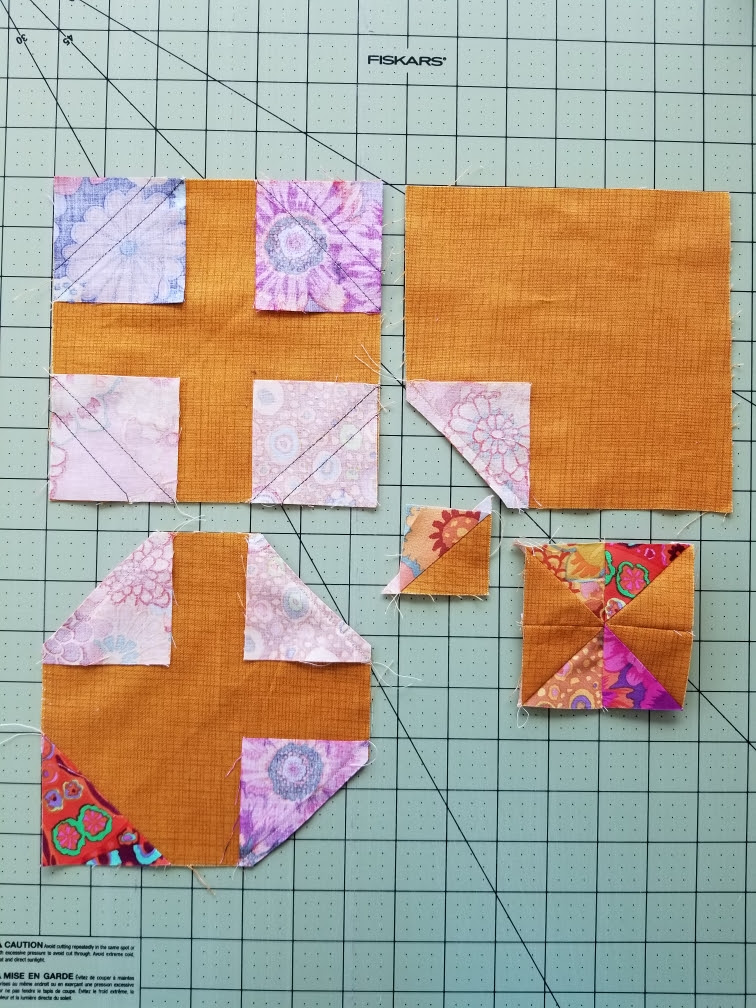
Let’s get started: two types of blocks
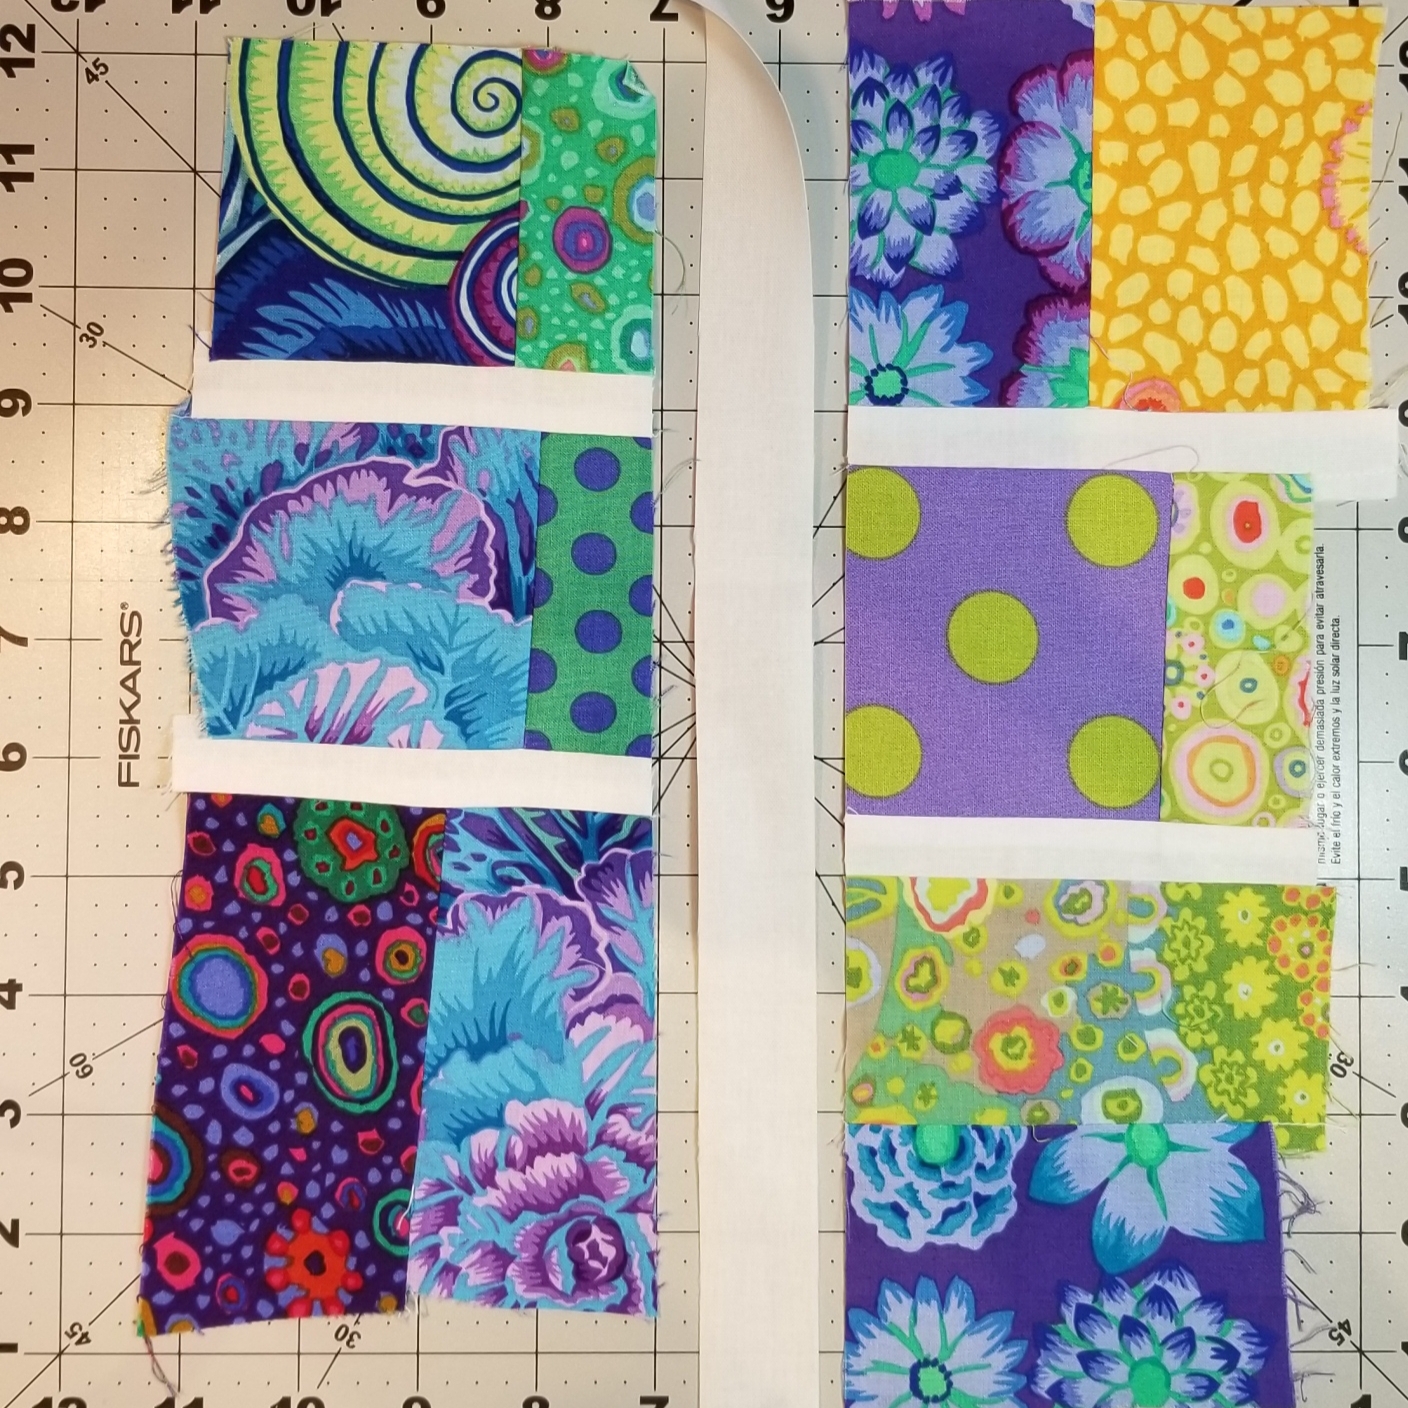
Sort scraps into colour groups, this will make them “happy scraps”
From the background fabric cut 1” wide strips for the grout between the scraps.
Version #1: Stitch grout strips to all 4 sides of a good sized scrap (3-4” rectangle). Finger press the seams towards the grout after each addition. Pic.1
Stitch scraps to all four sides of grout. Trim. Note that the block is trimmed in a wonky manner. Pic.1
Add a second and final row of grout. Stitch fabric scraps to the second row of grout. Pic.2
Trim the block in a wonky manner. Pic.2
Cut the block into quarters, through the center. As you can see, it was a good idea to have started with a larger center, considering that it will be cut into four parts. Pic.3
You now have four quilt blocks.
Cut 1 – 10” square of background fabric for each block. Pic.4
Place a scrappy block onto the middle of a 10” square of background fabric.Pic.5
Note that the 10” square is 1” to 2” larger on all sides of the scrap block. Pic.4
On a rotating cutting mat make four cuts in a counter clockwise manner, edge to edge, along the four sides of the wonky quilt block. Move each strip out of the way after each cut. Pic.5
You will now have four wonky strips of background fabric. Stitch these strips onto the side of the block it was cut along.
The last and smallest strip cut will be the first stitched. The third cut will be stitched second. The second cut will be stitched third and the first cut will be stitched last.
The piece of background fabric underneath the wonky scrap block will be saved for another project. Square up all the blocks to a uniform size.
After trimming each block measures 8” square.
The blocks were laid out in a rainbow manner.
Version #2: Stitch a piece of grout to two scraps. Stitch together and add a 3rd scrap to the side with grout. Make a second unit. Pic.6
Trim to straighten one long side, add grout. Pic7. Stitch the second unit to the grout. Pic.8 Trim this unit in a wonky manner. If it is large, cut it into two pieces.
Place a scrappy block onto the middle of a 10” square of background fabric.Pic.5 (Same as in version 1)
Note that the 10” square is 1” to 2” larger on all sides of the scrap block. Pic.4 (Same as in version 1)
My finished quilt is 5 rows of 5 blocks. I added a 6 ½” outer border of the same background fabric to create the effect of “floating” scrap blocks. I used Fireside on the back and a pale coloured binding.
This post is copyrighted material and cannot be copied for sharing in any form. Enjoy this article and have fun making this quilt. Please do invite your friends to visit my blog and enjoy the article themselves. Thanks for helping writers, bloggers and teachers thrive!
You will cut 4 – 5” wide strips from each fat quarter, along the selvage.
You will have four stacks of 12 different fabric strips.
The fabrics must be in the same order in each stack.
Sew all twelve strips together along one long side of the 5” wide strip. You can sort them in a pleasing manner before you start, but, all four stacks must remain in the same order.
¼” seam allowance throughout
Press all seams in the same direction on each strip set. When done you will have four strip sets of 12 joined strips the unit will measure about 18” wide (US) 20” wide (CDN) and 55” long.
Sew each unit into a tube by sewing the long side of strip number one to the long edge of strip number twelve. Press that seam in the same direction as the other seams. Make a total of four tubes.
Lay one unit on your cutting mat, right side out, smooth and straight. Without too much waste trim one side to square it up. From the square up side cut 2 ½” wide strips for a total of seven strips.( Save the excess for another project!) Keep in a neat pile. Do the same with three remaining tubes. You have 4 stacks of 7 strip sets.
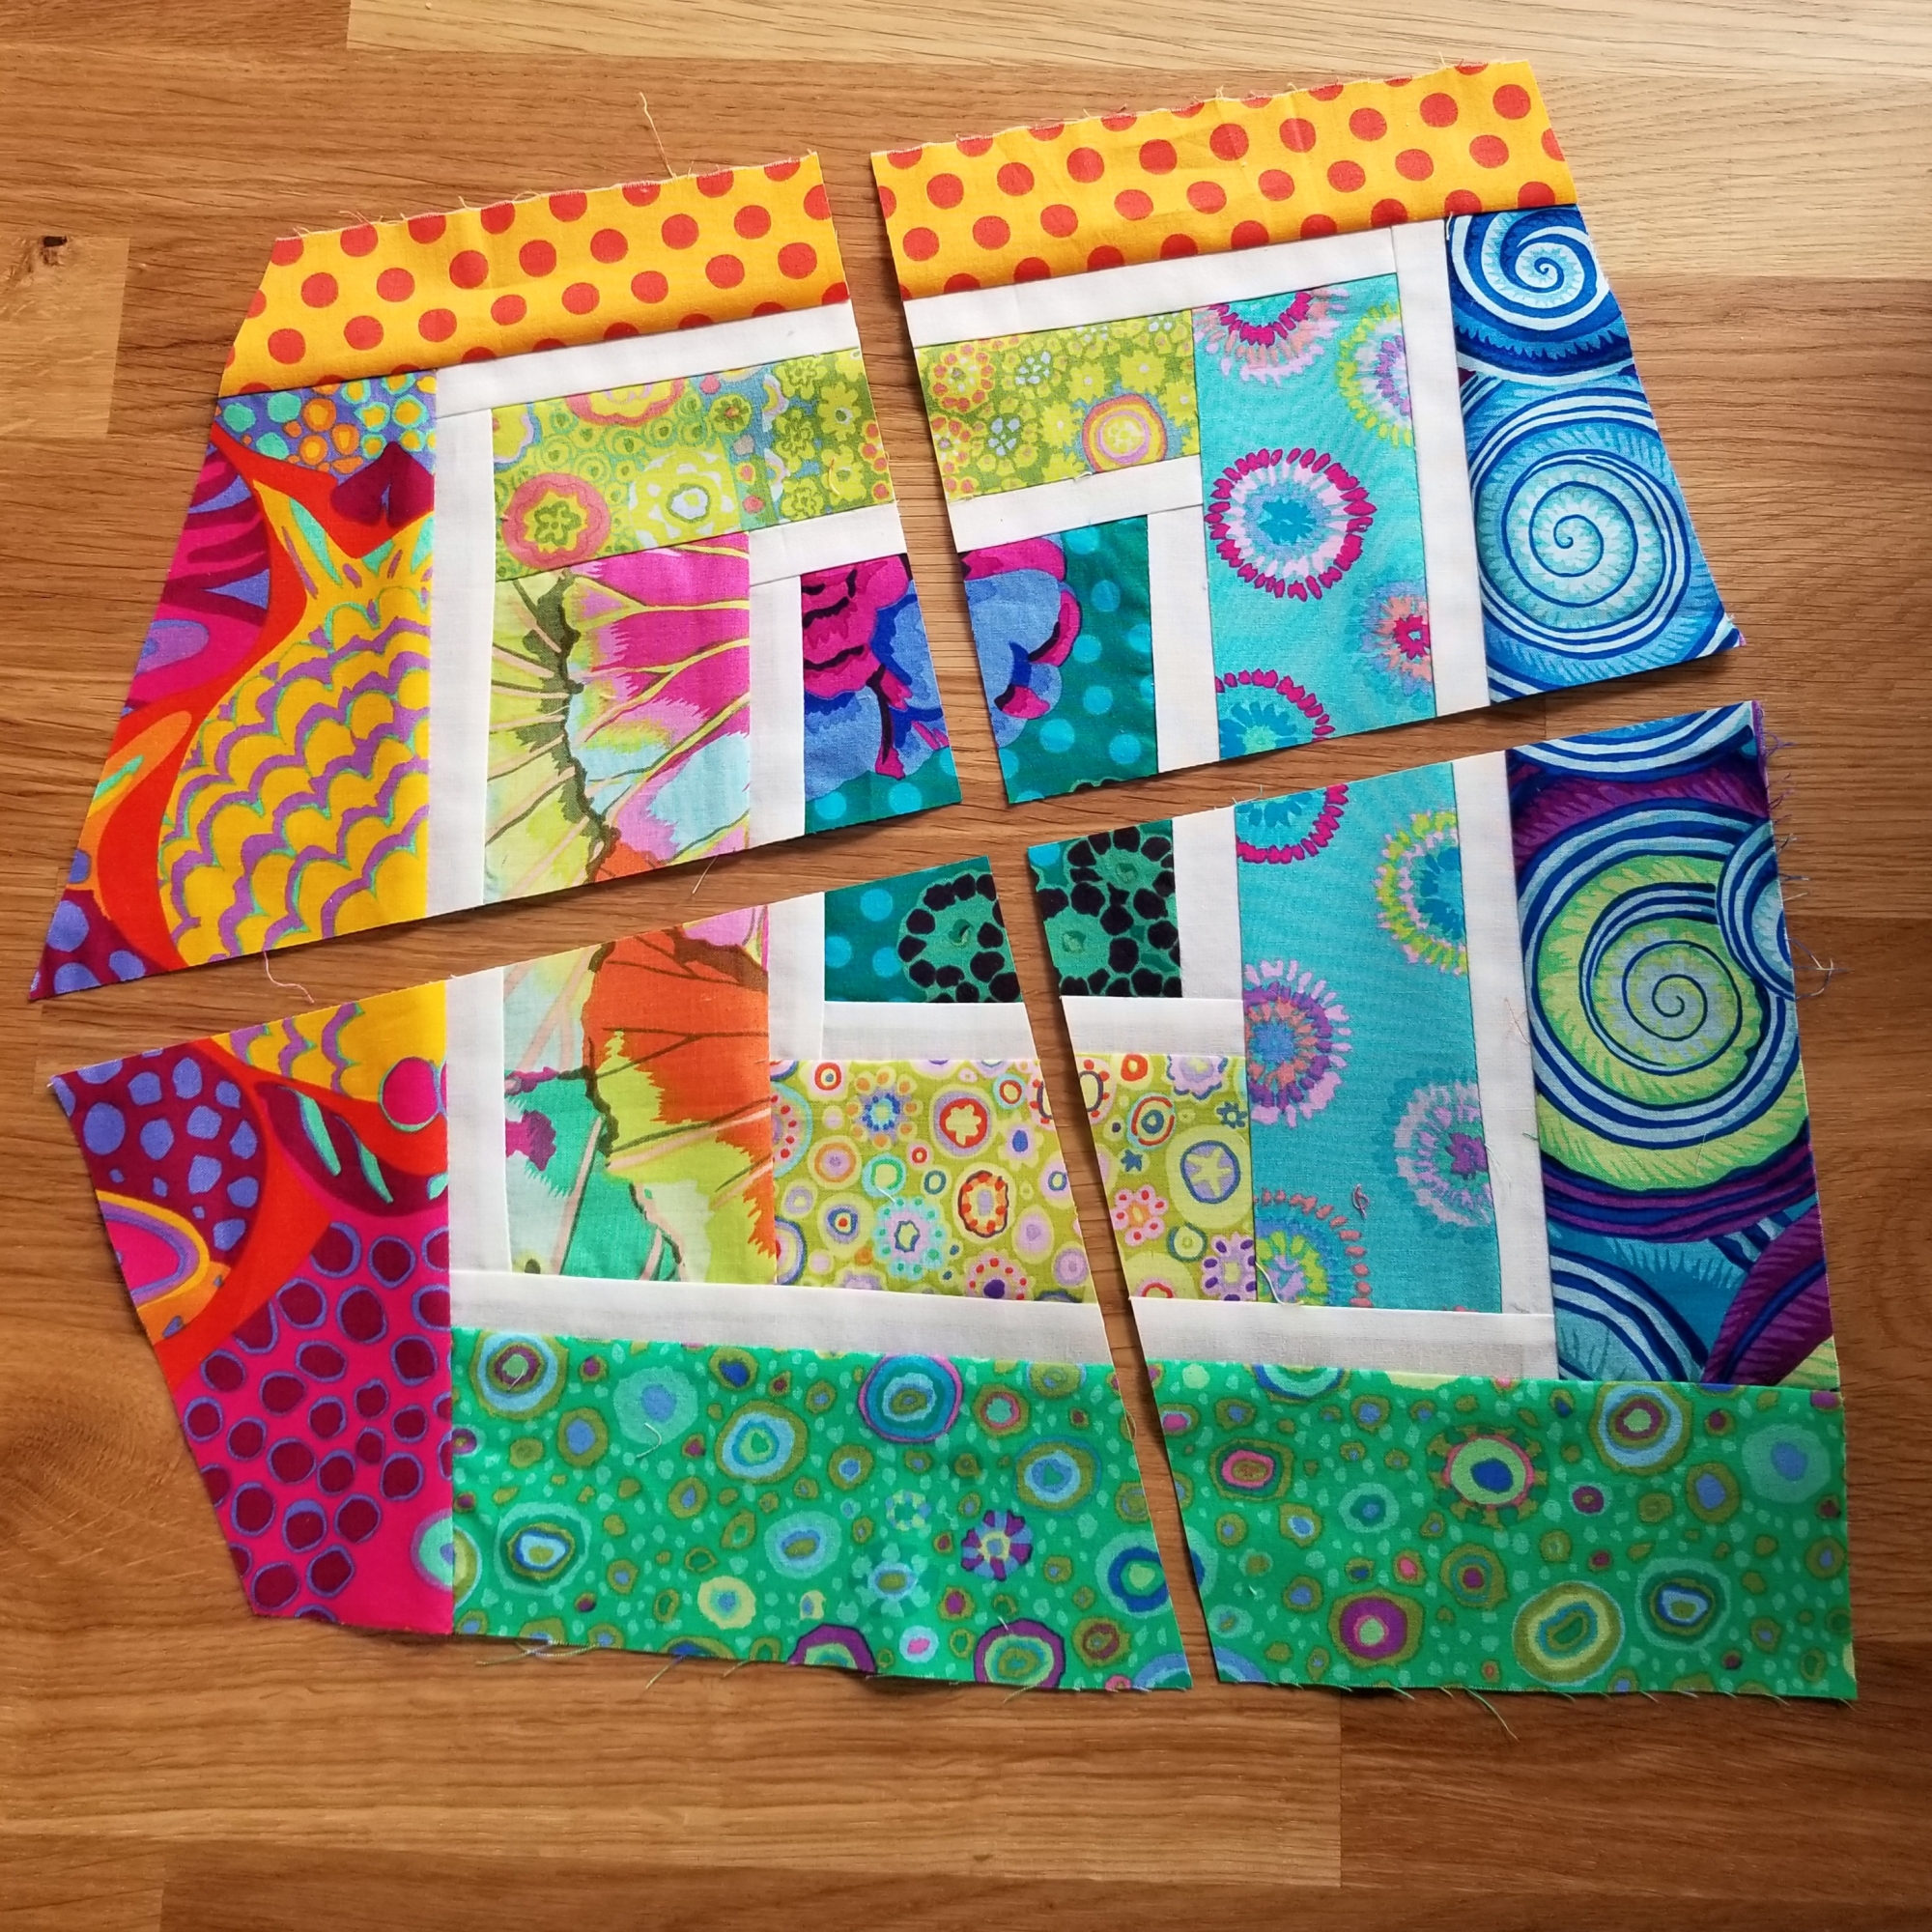
Working with one stack at a time, lay out the seven strip sets side by side.
At the top of strip #1, designate a fabric as the first fabric.
At the top of strip #2 fold the first fabric in half.
At the top of strip #3 will have the second fabric’s seam at the top.
At the top of strip #4 will have the second fabric folded in half.
At the top of strip #5 will have the third fabrics’ seam at the top.
At the top of strip #6 will have the third fabrics’ folded in half
At the top of strip #7 will have the fourth fabrics’ seam at the top
Continue laying out all the remaining strips sets side by side #8, #9 through #28.
Use painter’s tape to number the strips 1 – 28.
Cut open strip #1 at the top, along the stitching (do not open the seam)
Cut open strip #2 along the fold (the middle of the first fabric)
Cut open strip #3 along the seam between the first and second fabric, continue to cut the strips open of all the remaining strips
Sew all 28 strips together making sure that the seams of one strip is centered in the middle of the rectangle beside it. Use a few pins, start pinning from the end of the seam. This way you will end with the seams even.
Add a narrow inner border (1.5″ cut)and an outer border (5″ cut) You are done. Now quilt it!
Baby Quilt – 5 Fat Quarters – Lay the 5 fat quarters on top of each other, selvages even. Trim off selvages.
Cut into 2.5” strips along the selvage edge. You will have stacks of five different fabric, 2.5” wide by 19.5”.
Make 8 stacks.
From 7 stacks of five different fabrics cut:
1 – 2.5”x2.5”
2 – 4.5”x2.5”
1 – 6.5”x 2.5”
You will have one stack remaining. From this stack you will cut extra 2.5”x 2.5” squares as needed.
Don’t cut the whole pile into 2.5” squares immediately, in case you make a mistake later and require a larger piece.
Sort all cut pieces into piles of 2.5” squares, 4.5” rectangles and 6.5” rectangles. Keep families together, don’t mix up.
You will have five piles of 2.5” squares, five piles of 4.5” pieces and five piles 6.5” pieces
Select a square of one print and stitch a 2.5” (different) piece to one side. Add a 4.5” piece to both long sides. Add a 6.5” piece to the remaining side. You will have a different fabric in the center, with another (different) fabric all the way around to create a “Once around the Square” Block. You will make 35 blocks. Place the 35 blocks in seven rows of five across, random or in diagonal rows sorted by colour, as you please.
Fat Quarter Grocery Bag
Two fat quarters. Trim both fat quarters to same size, about 18” wide and 20” tall.
Use the “French Seam” method to clean finish the side seams and bottom seam the same way as for the Easy Pillowcase.
Make two straps. I used 2-4” wide strips, pressed in half, wrong sides together. Next, open up the fold and press, towards center, 1” along both sides. The two long raw edges will meet at center. Press along the center fold again. You will have two 1” wide straps.
Top stitch with “Straight Stretch Stitch” set at a length of 3.5 – 4mm. Cut straps to your desired length, baste to raw edge at top of bag. Press to wrong side ¼” and another 1” to 1.5” Top stitch with same stitch as for straps.
Choose project size: Placemat, wall hanging, table runner, lap quilt, bed quilt or HUGE Wall Art
Colour: Pick a palette of colour. Check out a colour wheel. Look around you for inspiration. Use an object such as a vase, rug or a pillow for colour options. (beach, forest, monochromatic, African etc)
Shape: Lines, curves, squares, circles, waves, abstract……. Pick a style and stick with it throughout the project
Collect your fabrics. Be it by design, by purchasing the desired colours OR work with what you have by sorting scraps into colour groups that are pleasing to YOU. Maybe start with your scraps and purchase new to fill in the gaps
Before you start to sew:
Get your sewing machine, cutting table pressing area prepared. Doing so, prepares for fun, satisfaction and pure bliss
Machine is clean, insert new needle such as a size 70 or 80 microtex.
Thread the machine with Aurifil 50wt thread, it is super fine and strong, full bobbin, lasts longer and your seams will press flatter. Choose a neutral colour that will work with all your fabric colours.Let’s go!
You already know how to sew and understand the basic rules of sewing. With improvisational patchwork “accuracy” is not important. You are not following a pattern, the patches need not match up or measure up to a designers instructions, sooo…….. ¼” seams are not required but not frowned upon.
It IS important to sew a straight line (just try pressing flat and open a curved seam!)
Grab two pieces of similar sized fabrics and stitch them together. Your first pair!
Grab two more pieces of fabric, stitch. Repeat, make a pile. Time to get up and stretch, head over to the ironing board and press the pairs open, as you would usually do.
Consider each pair the start of a block. How many blocks? How big will each block be when finished?
8” or 20”? The smaller the block the more blocks you will need.
Make 9, 12, 20 blocks. You get the idea.
Set your pairs beside the sewing machine. Pick a third piece of fabric and stitch it along one side, any side, you are the designer.
At this point you can start making “rules” or we should really call them “the steps in YOUR design”.
Stitch the third pieces to every pair and head to the ironing board. Don’t like pressing? It is okay to finger press the seams instead! But do press once you have made the blocks
At any time you can hang the blocks on a design board, step back and ponder about what you see.
Look for the flow of the design, do you like it, move it around, rotate, play. At some point you will want to stop making each block bigger. Now is the time to start compiling all the blocks into one piece.
There are several ways to do this,and it is all fun:
Simply sew two blocks together, trimming after stitching. If a block is too small to fit, make it bigger. Too big? Trim.
Sew to blocks together with a secondary unit in between, maybe only a thin strip of fabric
Cut one or two blocks into parts, rearrange and stitch together with each other or take a piece and start another block!
Here is the blog I wrote originally for my Improvisational Patchwork and Dye Class
With bobbins wound with white Aurifil 100% Egyptian cotton thread.
“Just sew scraps together,” the teacher said. “Just do it! Add a scrap, add a square, add a strip,” suddenly a quilt block is done.
“Make another block” said the teacher. And another, more, more, more. Square up the blocks, join the blocks.
In no time we had a quilt top ready to……………….Dye!
Knowledge of dyeing was not a requirement in this class. The simple steps were explained, but the dye mixing was left to Carola’s daughter Alaina. The students were here to enjoy the process of sewing and see the results of their own colour choices in their beautiful dyed quilt tops.
Low water immersion Avocado Green, Curry and Egg Plant
Above is Carola’s quilt top soaking in the Procion Dye tub, a shallow plastic tub about 18″ x 24″ After 15 minutes of steeping in the dye, soda ash solution is added. All in all, very little water is used in this process. Only one hour later the quilt top is ready to be rinsed. “Rinse until the water runs clear” Carola said.
Aurifil 50 weight 2 ply was used to free motion quilt
Finally, here is Carola’s hand dyed quilt top. All the different fabrics took the dye in different ways.
The dark square in the middle is silk velvet
It is all the twists and turns in the whole process that makes Improvisation Patchwork such a fun, inspiring and uplifting experience!
The sewing machine is your pencil, the fabric is your paper, let’s draw! Doodling and drawing is mainly a “free motion” sewing technique.
However, you can also do many parts of your straight line work such as a flower stem, with the feed dogs engaged.
Below are many of my tips, tricks, techniques and suggestions. They are not in “step-by-step-order”, so read all the tips before starting:
Always practice your doodling before you make a big project. You will be more confident, you will have sorted out any issues such as bad tension, needle type/size/age and thread colours.
Approach doodling with your sewing machine with the attitude of a five year old being asked by the teacher to draw pictures. Although your work may initially look like a scribbly mess, they will become “works of art” with practice. In other words, enjoy yourself and don’t be critical of your work, you are on the path to awesome success!
Free Motion set-up: Disengage any “Built-in Walking Foot/Dual Feed/IDF”
Drop feed dogs (If they cannot be dropped, cover them with the feed dog cover provided)
Attach the extension table to the machine. This is a must. Your left hand will now have a surface to work on. If you are quilting with the machine dropped down in a cabinet, you will not need an extension table.
Optional: Cover the bed (sewing area around the needle) of the machine with a “Sew Slip” a teflon sheet. Your fabric will move more smoothly and wont bind on the uneven surfaces of the sewing machine
Wear Quilting Gloves. They give you a firm grip on the fabric and you will be able to move it without your hands slipping. This will give you the control to achieve an even stitch length!
Insert a new needle, size 80/12 or 90/14. Choose a sharp needle such as a Microtex, jeans or a quilting needle. Change to a new needle every few hours of sewing. Or, choose the needle that works best for you, but change it often.
I use Aurifil Mako Cotton Thread for Doodling. In the needle, 28 weight is thick and really shows off the stitching! In the bobbin I use 50 weight, a very fine thread. You won’t be changing bobbins as often.
Select the needle down function. This keeps the needle in the last stitch whenever you need to pause.
When you start to sew, moving the fabric, sew only in the area between your two hands. Do not sew in the space above or below your hands. Instead, stop, re-position your hands and continue stitching. I envision my two hands on the fabric as an embroidery hoop, clamped down on the fabric. Stitch “in the hoop”, when done, re-position “the hoop” and continue sewing.
Doodle, Sketch and Drawing Tips:
Draw your design with a pencil on paper. This is good practise for warming up and not wasting fabric and thread, saves you from using the seam ripper. Doodle!
Prewash fabric to shrink the fibers. This is optional, but a good suggestion for some fabrics as they may be washed later.
Stabilize the fabric to give it a “backbone.” Stitching on single layers of fabric may cause puckering and shrinkage. Stabilizers are a must.
Choose either a tear-away stabilizer or my favourite: thin batting (I’m a quilter) Even a second layer of fabric can be considered a stabilizer.
Attaching the fabric in a sewing machine embroidery hoop is also an option, to eliminate puckering and help in handling the fabric.
Test the upper and lower tensions on your machine. Too tight tensions will pucker the fabric. If the tension is too tight it will manifest itself later, especially after washing.
Draw guidelines on the fabric with a blue wash-away marker. The lines should be considered a general guide, to help you with the proportions of the design. Don’t worry about hitting your guidelines perfectly (no fun otherwise)
Writing words: Mark lines the same as in your grade two exercise book. You remember!
My favourite way to stabilize my fabric is to use thin batting, which will remain in my project. Other ways to stabilize the fabric is with a tear-away temporary stabilizer, starch or even an embroidery hoop designed for use in sewing machines.
Can’t draw designs? Trace designs from a colouring book (please keep in mind not to use copyrighted material. It is okay to use other people’s designs for inspiration, But do not copy. If you do copy a pattern you have purchased, you will have permission to do so. But it must be for personal use only and not to be shared with others. If in doubt, contact the owner of the design
My favourite way of sketching a design such as a dog, poppy, bird etc. is to google “How to draw a_______. There are lots of on line drawing tutorials that show the steps, tricks and secrets of how to draw anything! Who knew it could be so easy!